Quantcast
Channel: Rick Strahl's FoxPro and Web Connection Weblog
Viewing all 134 articles
Browse latest View live

Fixing Windows Downloaded File Blocks and wwDotnetBridge

$
0
0

This is kind of a 'good to know' technical post that discusses some backround information around wwDotnetBridge and one of the biggest issues with using it. In this post I'll talk about Windows Download File Blocking due to Zone Identifier marking, along with a solution on how to programmatically unblock files easily, the fix for which will start showing up in version 6.22 of wwDotnetBridge going forward.

If you arrived here and don't know what wwDotnetBridge is, it's a bridge interface for accessing .NET from FoxPro without requiring COM instantiation. wwDotnetBridge hosts the .NET Runtime in FoxPro and provides a Proxy wrapper that can create instances of objects, call static methods, handle events, access generic members, deal with arrays and collections efficiently and provides a ton of helpers to access features of .NET that COM Interop can't.

Glowing features aside, in this post I'm talking about the #1 problem that surrounds wwDotnetBridge which is the dreaded Windows File Blocking Issue. This issue is caused by files downloaded from the Internet either directly or in a Zip file that Windows has marked as Blocked.

A blocked file cannot be loaded into .NET over an AppDomain boundary, which in turn causes wwDotnetBridge to fail to load the .NET Runtime properly. It's a big fail and while there are easy solutions, to date I hadn't been able to automate it away. That is until today - I'm happy to say that I've found a solution to this problem. Better late than never ??

What's the Problem? Blocked files and wwDotnetBridge

For wwDotnetBridge blocked files are a big problem, because if you download wwDotnetBridge from Github or from West Wind Client Tools you are downloading a Zip file which when unzipped creates - you guessed it - blocked DLL files.

What File Blocking Does

This is a 'protection' feature of Windows, which associates a Zone Identifier stream with a given file name using something known as Alternate Data Streams (ADS). When you download a file to your Downloads folder and that adds the Zone Identifier alternate data stream in yourfile.dll:Zone.Identier. If you download a Zip file, the contents of the Zip file - any executables - are marked as well. Once the zone identifier exists it's moved along with the file if you copy it to another location on the local drive. This is all handled by the file system.

How that Zone indicator is used is up to the host application. It turns out FoxPro doesn't care about it and I can reference a DECLARE DLL and it works just fine. For example, even when marked as 'blocked', wwIPStuff.dll works just fine in FoxPro without first unblocking.

However, the .NET Runtime as part of hte bootstrapping process does care about Zone Identifiers, so when wwDotnetBridge passes wwDotnetBridge.dll to the .NET Runtime/AppDomain as the runtime entry point assembly, it checks the Zone Identifier and refuses to load the dll.

What Blocking looks like with wwDotnetBridge

When wwDotnetBridge is run with a blocked wwDotnetBridge.dll file you will get an error. Running this most basic code:

DO wwDotnetBridge
loBridge = GetwwDotnetBridge()
loBridge.GetDotnetVersion()

will fail with an Unable to load CLR Instance error in the Load() method like this:

Note that this particular returns no error in lcError because the runtime that normally returns an error is not actually loaded yet. Instead wwDotnetBridge provides an error message with the most likely scnearios and a link to the docs.

In order to get wwDotnetBridge to run wwDotnetBridge.dll first has to be unblocked - which has been the cause of innumerable support requests.

Blocked only for Downloaded Files Or Downloaded Zip Archives

Note that this error occurs only if running a downloaded wwDotnetBridge.DLL either directly or inside of a ZIP file. So it happens with the GitHub and West Wind Client Tools zip files, but it does not with Web Connection and Html Help Builder because both of these tools use an installer which never flags these files with the Zone Identifier responsible for the blocked files.

Unblocking - Powershell

It turns out that unblocking is a common administration task in Windows and Powershell has a dedicated commandlet for it:

PS> unblock-file -Path '.\wwDotnetBridge.dll'

You can run that command and it will unblock the DLL and the error goes away. It's not an Administrative task either so even a standard user can run this command. Easy, but not exactly automatic.

I played around with this by running load, checking for a specific error and if I see it unblocking using the PowerShell command from within FoxPro:

lcPath = FULLPATH("wwdotnetbridge.dll")
lcCmd = [powershell "Unblock-File -Path '] + lcPath + ['"]
RUN /N7 &lcCmd 

While this works to unblock the file, this process is slow (shelling out) and once unblocked I still have to quit FoxPro or my application to see the newly unblocked DLL - a retry to reload still fails in the same VFP session. So while it works I still see at least one initial failure.

Close but no cigar.

Unblocking - Deleting the Zone Stream

After a bit of research it turns out that there's a more direct way to unblock a file which involves deleting a special file in the Windows file system. This Alternate Data Stream can't be deleted using FoxPro's ERASE FILE so we have to use the Windows API DeleteFile() function instead. Easy enough:

*** Remove the Zone Identifier to 'Unblock'
DECLARE INTEGER DeleteFile IN WIN32API STRING		  			  			
DeleteFile(FULLPATH("wwDotNetBridge.dll") + ":Zone.Identifier")

*** To be extra sure - unblock other dependencies
DeleteFile(FULLPATH("newtonsoft.json.dll") + ":Zone.Identifier")
DeleteFile(FULLPATH("markdig.dll") + ":Zone.Identifier")

Et voila!

This code clears the Zone Identifier which is responsible for the Block on the file.

Deleting effectively unblocks the dll and if the identifier doesn't exist DeleteFile() quietly fails. And because it's a Windows API call it's also relatively fast - quick enough that I can run it every time wwDotnetBridge is instantiated just to be sure the zone identifier isn't present.

So now that code is called as part of the load sequence in wwDotnetBridge which should do away with the blocked DLL issue for good. Yay!

What about other blocked DLLs

Please note that the only DLL affected is wwDotnetBridge.dll. wwIPStuff.dll and Newtonsoft.json.dll and markdig.dllwork fine without unblocking. The reason is wwDotnetBridge.dll is initial .NET DLL loaded containing the wwDotnetBridge type when the .NET Runtime is bootstrapped in this code:

lnDispHandle = ClrCreateInstanceFrom(FULLPATH("wwDotNetBridge.dll"),;"Westwind.WebConnection.wwDotNetBridge",@lcError,@lnSize)

Depending on your security setup you may still have to set LoadFromRemoteSources in your config file. I generally recommend you always add the following in a yourapp.exe.config and in your vfp9.exe.config (in the VFP install folder) to make .NET behave like other Win32/64 applications when it comes to network access:

<?xml version="1.0"?><configuration><runtime><loadFromRemoteSources enabled="true"/></runtime></configuration>

The ClrCreateInstanceFrom() in wwIpStuff.dll basically loads the .NET runtime, creates a new AppDomain, then loads the wwDotnetBridge .NET type from wwDotnetBridge.dll into it over AppDomain boundaries. This crossing of AppDomain boundaries before .NET policies are applied at this system level is what likely triggers the error in the first place.

A Big Load Of My Back!

This Windows file blocking has been a major thorn in my side and one of the sticking points around wwdotnetbridge adoption. As a new user when you're just kicking the tires the last thing you want to see is a nasty unspecific error on first launch. Even though this problem is prominently documented, most people don't look at the documentation carefully so it's easy to miss this.

Now, with this feature added to the latest wwDotnetBridge (not quite released yet) it should be much easier to get started with wwDotnetBridge regardless where the installed version comes from.


Using Browser-Sync to live refresh Server Side HTML and Script Changes

$
0
0

Client side applications have been using Live-Reload behavior forever. When building Angular or Vue application I don't give a second thought to the fact that when I make a change to an HTML, Typescript/JavaScript or CSS file anymore and I expect the UI to reflect that change by automatically reloading my browser with those changes. This workflow makes it incredibly productive to iterate code and build faster.

Unfortunately the same cannot be said for server side code. When making changes to script pages in Web Connection I make a change, then manually flip over to the browser to review the change. While it's not the end of the world, it's much nicer to have a browser side by side to my editor and see the change side by side.

Linking Browser and File Watchers

If you haven't used client side frameworks before and you don't know how browser syncing works here's a quick review. Browser synching typically works via tooling that does two things:

  • File Change Monitoring
  • Updating the browser

File monitoring is easy enough. A file system watcher monitors the file system for any changes to files you specify via a set of wildcards typically. If any of these files are changed the watcher will kick in to perform an action.

Depending on what you care about this can be as simple as simply reloading the page, or in the case of actual code files requires a rebuild of an application.

ASP.NET Core actually includes a built-in file watching tool called dotnet-watch which you can run to wrap the dotnet run command. But it only handles the recompilation part, not the browser refresh.

The other part of the equation is refreshing the browser. In order to do this any tool need to load the browser and inject a little bit of code into each page loaded in the browser to essentially communicate with a server that allows reloading the active page. This typically takes the form of a little WebSocket based server that runs in the Web page and communicates with a calling host - typically a command line tool or something running in developer tools like Browser-Link does in Visual Studio.

As mentioned Browser-Link in Visual Studio seems like it should handle this task, but for me this technology never worked for server side code. I've only got it to work with CSS file which is actually very useful - but it would be a heck of a lot more useful if it worked with all server side files even if it was just uncompiled files like HTML, JavaScript and Server side views that auto-recompile when they are reloaded. Alas no luck.

Browser-Sync to the request

Luckily we don't have to rely on Microsoft to provide a solution to this. There are a few tools out there that allow browser syncing externally from the command line or via an admin console in a browser.

The one I like best is Browser-Sync. Most of these tools are nodejs based so you'll need Node and NPM to install them, but once installed you can run them from the command line as standalone programs. Browser Sync does a lot more than just browser syncing.

In order to use Browser Sync you need a few things:

  • Install NodeJS/NPM
  • Install Browser Sync using NPM
  • Fire up Browser Sync from the Command Line
  • Let the games begin

As is common with many Web development related tools Browser Sync is built around NodeJS and is distributed via NPM, so make sure NodeJs is installed.

Next we need to install Browser-Sync. From a command prompt do:

npm install -g browser-sync

This installs a global copy of browser sync which can be run just like an executable that is available on the Windows path.

Now, in your console, navigate to the Web folder of your application. I'll use the Web Connection sample here:

cd \wconnect\web\wconnect

Next startup browser sync from this folder:

browser-sync start 
		--proxy localhost/wconnect 
		--files '**/*.wcs,**/*.wc, **/*.wwd, **/*.md, **/*.blog, css/*.css, scripts/*.js'

This command line basically starts monitoring for file changes in the current folder using the file spec provided in the files parameter. Here I'm monitoring for all of my scriptmapped extensions for my Web Connection scripts as well as CSS and JavaScript files.

Note the --proxy localhost/wconnect switch which tells browser-sync that I have an existing Web Server that's running requests. Browser-Sync has its own Web Server and when running NodeJs applications you can use it as your server directly. However, since Web Connection doesn't work with Node I can the -proxy switch to point to my application's virtual directory which is http://localhost/wconnect/. If you're using IIS Express it'd be --proxy localhost:54311. The proxy feature will change your URL to the proxy server that browser-sync provides, typically localhost:3000.

Here's what this looks like when you run browser sync:

Browser sync automatically navigates to http://localhost:3000/wconnect and opens the browser for you.

Now go to the No Script sample at wcscripts/noscripts.wcs page and open it. Next jump into your editor of choice and make a change to the page - change title to Customer List (updated) and save.

The browser updates immediately without an explicit refresh:

Now go back and remove the change... again the browser refreshes immediately.

Et voila, live browser reload! Nice and easy - cool eh?

Making Browser Sync easier to load

For tools like this I like to make it easy, so I tend to create a small program that loads browser sync with a single command. Here's a simple script I drop into my project folder to launch brower sync:

************************************************************************
*  BrowserSync
****************************************
***  Function: Live Reload on save operations
***    Assume: Install Browser Sync requires Node/NPM:
***            npm install -g browser-sync
***      Pass:
***    Return:
************************************************************************
FUNCTION BrowserSync(lcUrl, lcPath, lcFiles)

IF EMPTY(lcUrl)
   lcUrl = "localhost/wconnect"
ENDIF
IF EMPTY(lcPath)
   lcPath = LOWER(FULLPATH("..\web\wconnect"))
ENDIF
IF EMPTY(lcFiles)
   lcFiles = "**/*.wcs,**/*.wc, **/*.wwd, **/*.blog, css/*.css, scripts/*.js, **/*.htm*"
ENDIF

lcOldPath = CURDIR()
CD (lcPath)

lcBrowserSyncCommand = "browser-sync start " +;"--proxy " + lcUrl + " " + ;"--files '" + lcFiles + "'"
RUN /n cmd /k &lcBrowserSyncCommand

? lcBrowserSyncCommand
_cliptext = lcBrowserSyncCommand

WAIT WINDOW "" TIMEOUT 1.5
CD (lcOldPath)

ENDFUNC
*   BrowserSync

And now I can simply launch browser sync with a simple command from the FoxPro command window:

DO browsersync

No Support for Web Connection Process Changes

Browser sync works great for any content that lives in the Web folder structure. Unfortunately the process class lives in a separate folder hierarchy and can't be monitored there. So any changes you make in your process class controller will still require you to manually refresh the browser. Browser sync can't monitor files with ../../deploy/*.prg paths unfortunately.

If you really want to be tricky about it you can temporarily move your YourProcess.prg file into the Web folder, add the path to your FoxPro path and then have Browser Sync also monitor that very specific PRG files. Hacky - but it works.

Summary

Browser syncing may not sound like that impressive of a feature, but I have to say that it ends up changing the way you work. Because changes are immediately reflect you can much more easily experiment with small changes and see them immediately while you're editing them. This is especially useful for CSS changes that often are very fiddly, but also for script HTML layout changes.

Either way it's a great productivity enhancing tool.

Sync on...

this post created and published with Markdown Monster

Using Browser Sync to automatically reload Pages on Changes

$
0
0

Client side applications have been using Live-Reload behavior forever. When building Angular or Vue application I don't give a second thought to the fact that when I make a change to an HTML page, Typescript/JavaScript or CSS file anymore, and I expect the UI to reflect that change by automatically reloading my browser with those changes. This workflow makes it incredibly productive to iterate code and build faster.

Server side applications generally don't have this same functionality unfortunately, at least not out of the box. So for server side applications any change you make for HTML, CSS, JavaScript and Web Connection Script and Template Pages requires explicitly switching to and then refreshing the browser.

Turns out you can get browser syncing features for server side code, and it's relatively easy to do.

What am I on about?

If you haven't used client side frameworks before and you don't know how browser syncing works here's a quick review. Browser syncing typically works via tooling that does a few things:

  • Monitors for files that have changed
  • Refreshes the browser when a file you care about is updated
  • Reloads the currently active page in the browser

Sounds simple, right? But, yet it's a huge productivity improvement to automatically see changes you've made in the editor reflected in the live application which simply reloads with the changes anytime you make a code change.

Browser Sync to the Rescue

So it's pretty easy to do this using a tool called Browser-Sync. As the name suggests this tool lets you sync a browser to changes that have been made in the file system. I'm going to look at the simple use case of refreshing a single browser here, but Browser Sync actually supports syncing any number of devices including mobile phones/pads simultaneously.

Ok, enough talk. How does this work?

First you're going to need a couple of things:

  • Make sure you install NodeJs which installs NPM
  • Install Browser Sync Globally via NPM
  • Run a browser-sync command from the Command Line

Most tools of this type these days are based on NodeJs and Browser Sync is no exception so you have to make sure you have Node installed.

Download and Install NodeJs

Once Node is installed you have to install Browser Sync and you use NPM to do it. On a Windows or Powershell command window type:

npm install -g browser-sync

This installs browser sync globally onto your machine, which means it becomes available on the Windows path as a global tool.

Next, still on the command line, navigate to the Web Root folder for your Web application. For example I might navigate to c:\wconnect\web\wconnect for the Web Connection sample site.

Now you can start up browser sync to monitor your Web site (all on one line):

browser-sync start 
   --proxy localhost/wconnect
   --files '**/*.wcs,**/*.wc, **/*.wwd, **/*.blog, css/*.css, **/*.html, scripts/*.js,**/*.md'"

I'm telling Browser Sync to watch all css, scripts, and all of the templates in my project. Note I also tell it to proxy my existing URL. Browser Sync basically takes over the original URL and forwards it to a new URL on a new local port.

This starts browser sync in watch and sync mode and it will launch a new url*:

The browser launches on port 3000 and the site now works as it did before. Note that the port may vary but it'll show you on the command line.

Navigate to one of the pages of the site you want to modify. I'm going to use the No Code page example here (nocode.wcs).

Now open wcscripts/nocode.wc in your editor of choice and make a change to the say the header that says Customer List. Press Ctrl-S to save the file and notice that the browser reflects that change immediately.

Et voila, you now have live reload.

Make it Easier to Launch BrowserSync

I like to make things that I use a lot easier to start, so I create a small PRG to help me launch it from within FoxPro. I dump this into my project directories, customized for each of the projects I use.

As of Web Connection 6.50, it generates a browsersync.prg file specific for your project

************************************************************************
*  BrowserSync
****************************************
***  Function: Live Reload on save operations
***    Assume: Install Browser Sync requires Node/NPM:
***            npm install -g browser-sync
***      Pass:
***    Return:
************************************************************************
FUNCTION BrowserSync(lcUrl, lcPath, lcFiles)

IF EMPTY(lcUrl)
   lcUrl = "localhost/wconnect"
ENDIF
IF EMPTY(lcPath)
   lcPath = LOWER(FULLPATH("..\web\wconnect"))
ENDIF
IF EMPTY(lcFiles)
   lcFiles = "**/*.wcs,**/*.wc, **/*.wwd, **/*.blog, css/*.css, scripts/*.js, ../../fox/*.prg"
ENDIF

lcOldPath = CURDIR()
CD (lcPath)

lcBrowserSyncCommand = "browser-sync start " +;"--proxy " + lcUrl + " " + ;"--files '" + lcFiles + "'"
RUN /n cmd /k &lcBrowserSyncCommand

* ? lcBrowserSyncCommand
* _cliptext = lcBrowserSyncCommand

WAIT WINDOW "" TIMEOUT 1.5
CD (lcOldPath)

*** Launch your main Application
DO TimeTrakkerMain

ENDFUNC
*   BrowserSync

Then to start it I simply do this from the FoxPro command line:

DO browsersync

which launches browser sync in a new command window, launches a new Web browser instance or tab if the browser is already open, and then also launches your server application.

Note that you probably want to customize the defaults to match your project's IIS (or IIS Express) Url, path (usually ..\web in a project).

Summary

Live reloading is a big time saver. Although it doesn't seem like much time is involved in manually refreshing a browser, think about how often you do this in the course of the day while working on the HTML, CSS and JavaScript. Over time the amount of time used really adds up. This is especially nice if you have multiple or very large 4k monitors here you can always leave the browser window up and running.

Live reload changes the way you build applications. A lot of times you end up trying something, saving glancing over to see what it did, then try something else - it drastically improves the workflow and encourages you to experiment with little changes that otherwise might be to too time consuming to try.

Check it out - it's one of those little gems that make your day to day routines a lot easier.

this post created and published with Markdown Monster

Shutting down file-based Web Connection Instances with WM_CLOSE Messages

$
0
0

Recently we had a long discussion regarding killing a specific file based instance in a West Wind Web Connection application. Not just killing actually but issuing a 'controlled' shutdown of the instance. The scenario in this post is that the customer is having an issue with an application that is leaking memory and he needed to detect the memory leakage in a particular instance and be able to shut down that instance and restart a new one.

One issue that came up as part of this thread is the idea that file based instances cannot be shutdown externally...

File Based Shutdowns

When you run West Wind Web Connection in file based mode, Web Connection runs as a standalone FoxPro Forms application that has a READ EVENTS loop. The form that pops up when you run the server is the UI that holds the server in place and the READ EVENTS essentially is what keeps the application alive. When the READ EVENTS loop ends when you close the form - so does the application.

Generally speaking Web Connection file based applications can't be killed externally, short of explicitly running a Windows TASKKILL operation or by explicitly exiting the form.

If you've ever tried to shut down a running Web Connection application from the Windows Task bar with the Close command you know that that doesn't work as expected. You get the following message from the FoxPro window or your application if it's running outside of the IDE:

which is pretty annoying.

Fixing the Shutdown Issue

There's a pretty easy workaround for this issue. As stated above the problem here is that Web Connection is sitting inside of a READ EVENTS loop and that's what's forcing the application to stay up when Windows close command is sent to the FoxPro application window.

What's needed to fix this is to intercept the WM_CLOSE operation that Windows sends to shut down the application and explicitily force the application to release its READ EVENTS loop with CLEAR EVENTS.

FoxPro supports hooking into Window Messages via the BINDEVENTS() function and to do all of this just takes a few lines of code.

To start I added a ShutDown() method to the wwServer base class. This will become part of Web Connection but if you want to implement this now you can just add the ShutDown() method to your wwServer subclass.

************************************************************************
*  Shutdown
****************************************
***  Function: Used to shut down a FILE BASED application
***    Assume: Has no effect on COM based applications
***            as COM servers can only be closed externally
***            by the COM reference
***    Params: Accepts Windows SendMessage parameter signature
***            parameters aren't used but can be if necessary
************************************************************************
FUNCTION Shutdown(hWnd, Msg, wParam, lParam)

IF !THIS.lComObject
    CLEAR EVENTS
    QUIT
ENDIF

ENDFUNC
*   Shutdown

Note that there's a check for lComObject in this method. This whole Windows message and remote shutdown mechanism only works with file-based operation. In COM it's impossible to shut down instances remotely short of TASKKILL as the COM reference from the host controls the application's lifetime.

In file based however we can respond to WM_CLOSE events and then call the wwServer::Shutdown() method which effectively clears the event loop and then explicitly quits.

Next we need to hook up the WM_CLOSE message handling using BINDEVENT().

In its simplest form you can do in the YourAppMain.prg in the startup code at the very top of the PRG and wrap the BINDEVENT()\UNBINDEVENTS() call around the READ EVENTS call like this:

WM_CLOSE = 0x0010  && in wconnect.h or Foxpro.h
BINDEVENTS(Application.hwnd,WM_CLOSE,goWCServer,"ShutDown")

READ EVENTS

UNBINDEVENTS(goWCServer)

To take this a step further I added the code directly into the Web Connection wwServer class.

The first is at the very bottom of the wwServer::Init() method:

IF !THIS.lComObject AND _VFP.Visible
   BINDEVENT(_VFP.hWnd, WM_CLOSE, THIS, "ShutDown")
ENDIF  

and also in the wwServer::Dispose() method:

IF !THIS.lComObject AND _VFP.Visible
	TRY
		UNBINDEVENTS(THIS)
	CATCH
	* this may fail when shutting down an EXE but not in the IDE
	* we don't care about the failure as this shut be a shutdown operation
	ENDTRY
ENDIF

The latter code only fires when the form is shut down normally using the exit button - if the BINDEVENT handler actually fires the app is immediately shut down.

Testing Operation

To test this out one of the easiest ways to do this is to use to start your Web Connection application in file mode from within Visual FoxPro's IDE and then use the Task bar icon and Close Window from there.

This is what generated the Can't quit Visual FoxPro message before, but now with the BINDEVENT() code in place the Web Connection server will actually shut down. Yay!

If you want to do this programmatically a very simple way to do this is using .NET Code and LinqPad which you can think of like the FoxPro command window for .NET. There you can easily iterate over all the processes running, check memory usage and more.

void Main()
{
    // var proc = .FirstOrDefault(p => p.MainWindowTitle.Contains("Web Connection"));
    foreach (var proc in Process.GetProcesses())
    {
        if (proc.MainWindowTitle.Contains("Web Connection"))
        {
        	proc.Dump(); // show object info (below)
        	if (proc != null)   // && proc.PrivateMemorySize > 20000000)
        		proc.CloseMainWindow();
        }
    }
}

This makes it very easy to create a tool that can remotely look for Web Connection instances that have too much memory and attempt to shut them down.

Because this is just simple .NET Code you can also run something similar using FoxPro code using wwDotnetBridge:

do wwDotNetBridge
loBridge = GetwwDotnetBridge()

*** Returns a ComArray instance
loProcesses = loBridge.Invokestaticmethod("System.Diagnostics.Process","GetProcesses")

*** Note most .NET Arrays are 0 based!
FOR lnX = 0 TO loProcesses.Count -1
   *** Access raw COM Interop objects
   loProcess = loProcesses.Item(lnX)
   lnMemory = loProcess.PrivateMemorySize
   
   IF ATC("Web Connection",loProcess.MainWindowTitle) > 0
       loProcess.CloseMainWindow()
   ENDIF
ENDFOR

CloseMainWindow() is the same as using the Close Window and it's a soft shutdown of the application which shuts down somewhat orderly. In order for this to work you need to be running as the same user as the window you're trying to shut down or as an Admin/SYSTEM account that can access any account's desktop.

If CloseMainWindow() is not enough you can also call the Kill() method which is a hard TASKKILL operation that immediately shuts down the application.

It's important to understand that either of these operations will cause an out of band event in FoxPro meaning it will interrupt code executing in between commands. IOW, there's no guarantee that the application will shut down after say a Web Connection request has finished. In order to do this more logic is needed to set a flag that can trigger a shutdown at the end of a request.

More Caveats - Top Level Forms don't receive WM_CLOSE

The above code patch fixes the Can't quit Visual FoxPro message, which is useful. I can't tell you how often I've cursed this during development or when shutting down Windows.

But it this approach has limitations. If you're running a FoxPro application without a desktop window active, the WM_CLOSE message is never properly sent to either the _VFP desktop or even the active FoxPro Top level form. FoxPro internally captures the WM_CLOSE event and shuts the application down before your code can interact with it.

For Web Connection this means when you're running with Showdesktopform=On (which runs a FoxPro top level form and hides the desktop)** the application quits without any sort of shutdown notification**. This is a problem because when this happens the application quits and doesn't clean up. In my experience this will kill the application but the EXE will not completely unload and leave behind a hidden running EXE you can see in Task Manager.

For this reason 'closing' the window is not a good idea - you have to Kill() the application to get it truly removed.

What about COM Objects?

COM objects and file based servers are managed completely differently. COM Servers are instantiated as COM objects - they don't have a startup program with a READ EVENTS loop, and there's no way to 'Close' a COM server. You can't even call QUIT from within a COM server to kill it. QUIT has no effect inside of a COM server.

So how do you kill a COM Server:

  • Properly release the reference
  • Use TASKKILL

To properly release a reference of a Web Connection server the way to do this is to use the Administration links. You can find these links on the Admin page and you can also fire those requests using a HTTP client like wwHttp directly from your code.

The easiest way is to look at the links on the Admin page for COM server management:

Web Connection 6.18 introduces the ability to shutdown a specific server by process ID in COM mode. This works at the COM instance manager which looks for the specific instance in the pool, waits to shut it down and then starts a new instance to 'replenish' the pool.

However, realistically it's best to reload the pool. With Web Connection 6.17 we've made major improvements in COM server load times where instances are loaded in parallel and server loading is split out into instance loading and a Load sequence that fires on the first request. This makes it much faster to new servers and a pool reload is actually only as slow as the slowest server instance restart. So - don't be afraid to restart the entire pool of instances via the ReleaseComServers.wc link.

As I often point out - if you're running file based in production with Web Connection, you're missing out on many cool management features that only work in COM, like pool management, auto-recovery on crashes and now the ability to reload individual instances explicitly.

Summary

There are a all sorts of possibilities to manage your Web Connection instances in FoxPro and I've shown here a nice workaround that gets around the annoying issue of shutting down file based instances in development mode. It doesn't solve filebased shutdown in production scenarios at least not completely but it does offer a few more options that allow you to at least be notified of shutdown operations requested.

West Wind Web Connection 7.0 has been released

$
0
0

The final build of Web Connection 7.0 was released today and is available for download now. You can grab the latest shareware version from the Web Connection Web site:

Upgrades and full versions are available in the store:

Also released today is the User Security Manager for Web Connection which is an add on that handles user account authentication and and profile management:

Big Release

Web Connection 7.0 is a major update that includes many enhancements and optimizations.

Here's a list of all that has changed and been added:

What follows is a lot more detail on some of the enhancements if you are interested.

Focus on Streamlining and Consolidation

This release continues along the path of streamlining relevant features and making Web Connection easier to operate during development and for deployment. As most of you know Web Connection is a very mature product that has been around for nearly 25 years now (yes the first Web Connection release shipped in late 1994!) and there is a lot of baggage from that time that is no longer relevant. A lot of stuff has of course been trimmed over the years and this version is no different.

This release consolidates a lot of features and removes many libraries that hardly anyone uses - certainly not in new project - by default. The libraries are still there (in the \classes\OldFiles folder), but they are no longer loaded by default.

The end result is a leaner installation package of Web Connection (down to 20 megs vs. 35 megs) and considerably smaller base applications (down to ~700k vs 1.1meg).

Removing VCX Casses in favor of PRG Classes

One thorn in my personal side, has been that Web Connection included a few VCX classes, specifically several VCX classes that don't really need to be visual. wwSql, wwXml, wwBusiness and wwWebServer all were visual classes that have now been refactored into PRG classes.

This is a breaking change that requires changing SET CLASSLIB TO to SET PROCEDURE TO for these classes using a Search and Replace operation.

wwBusiness is a special case as it can and often was used with Visual Classes for subclassing. So, wwBusiness.vcx still exists in the OldFiles folder, but there's a new wwBusinessObject class and wwBusinessCollectionList class that replaces it. If you already used PRG based business object subclasses then it's a simple matter of replacing the SET CLASSLIB TO wwBusiness with SET PROCEDURE TO wwBusinessObject and replacing AS wwBusiness with AS wwBusinessObject.

For visual classes you can either continue to use the VCX based wwBusiness class, or - better perhaps - extract the code of each class to a PRG file using the Class Browser and deriving classes off wwBusinessObject. For visually dropped classes that were dropped on a form or container that code would also need to be replaced with THISFORM.AddProperty(oBusObject,CREATEOBJECT("cCustomer")) and so on.

VCX Class to PRG Class Migrations

Bootstrap 4 and FontAwesome 5

Other highlights in this update include getting the various support frameworks up to date.

Web Connection 7.0 ships with Bootstrap 4 and FontAwesome 5 (free) support which updates the original versions shipped in Web Connection 6 more than 4 years ago. This is one thing that's troublesome in Web applications: Client side frameworks change frequently and as a result anything that depends on them - including a tool like Web Connection - also has to update. This process is not difficult but it is time consuming as there are a handful of places in the framework (mainly the wwHtmlHelpers) where there are dependencies on some of these UI framework specific features.

That said, having upgraded 3 different applications to Bootstrap 4 and FontAwesome 5 I can say that the process is relatively quick if you decide to upgrade. 95% of the work is search and replace related, while the remaining 5% is finding specific UI constructs and updating them (mainly related to change in Bootstrap 4's use of Card vs. panels, wells, tooltips etc.).

While it's a nice to have feature to upgrade to the latest version of UI frameworks and keep up to date with new styles and UI framework features, it's also important to understand that you don't have to upgrade to the new UI Frameworks. If you have an app that runs with Bootstrap 3/FontAwesome 4 you can continune to use those older UI frameworks - using Web Connection 7.0 isn't going to break your application.

Migration from Bootstrap 3 to 4 in the documentation.

Project Management Improvements

One of the most important focal points of this update and many changes since v6.0 have been around making Web Connection Projects easier to create, run, maintain and deploy. Web Connection 7.0 continues to make things easier and quicker and hopefully more obvious for someone just getting started.

Fast Project Creation - Ready to Run

To give you some perspective here, I use the project system constantly when I need to test something out locally. When I see a message on the message board with a question to some feature it's often easier for me to just create a new project quickly and push in a few changes than even pull a demo project and add features. Creating a new project takes literally a minute and I have a running application.

There's a new Launch.prg file that is generated that automates launching a project consistently, regardless of which project you're in.

The process now literally is:

  • Use the Console
  • Run the New Project Wizard
  • DO Launch.prg

The browser is already spun up for you and additional instructions on how to launch either IIS or IIS Express are displayed on the screen.

Launch.prg is a new file generated by the new project wizard which basically does the following:

  • Calls SetPaths.prg to set the environment
  • Opens the browser to the IIS or IIS Express Url
  • If running IIS Express launches IIS Express
  • Launches your Web Connection Server instance
    using DO <yourApp>Main.prg

You can do this to launch with IIS:

DO Launch

which opens the application at http://localhost/WebDemo (or whatever your virtual is called).

To launch for IIS Express:

DO Launch with .T.

which is a flag that launches IIS Express and changes the URL to http://localhost:7000. This is a configurable script so you can add other stuff to it that you might need at launch time.

Here's what this script looks like for the WebDemo project.

********************************************
FUNCTION Launch
***************
LPARAMETER llIISExpress

CLEAR

*** Set Environment
*** Sets Paths to Web Connection Framework Folders
DO SETPATHS

lcUrl = "http://localhost/WebDemo"

IF llIISExpress
   *** Launch IIS Express on Port 7000
   DO CONSOLE WITH "IISEXPRESS",LOWER(FULLPATH("..\Web")),7000
   lcUrl = "http://localhost:7000"
ENDIF

*** Launch in Browser
DO CONSOLE WITH "GOURL",lcUrl
? "Running:" 
? "DO Launch.prg " + IIF(llIISExpress,"WITH .T.","")
?
? "Web Server used:"
? IIF(llIISExpress,"IIS Express","IIS")
?
IF llIISExpress
   ? "Launched IISExpress with:"
   ? [DO console WITH "IISExpress","..\Web",7000]
   ?
ENDIF

? "Launching Web Url:" 
? lcUrl
? 
? "Server executed:"
? "DO WebdemoMain.prg"

*** Start Web Connection Server
DO WebdemoMain.prg

This makes it really easy to launch consistently, and for any project and whether you are running with full IIS or IIS Express.

Even if you're running an old project I encourage you to add a Launch.prg for an easier launch experience. I've been doing this for years but manually, and now that process is automated.

Launch.prg also prints out to the desktop what it's doing. It tries to be transparent so you don't just see the black box but you can see the actual commands and steps to get your app up and running easily and to allow you launch even if you don't use Launch.prg. The goal is to help new users understand what's actually going on while at the same time making things much easier and more consistent to run.

BrowserSync.prg - Live Reload for Server Code

BrowerSync is a NodeJs based tool that can automatically reload the active page in the Web browser when you make a change to a file in your Website. The idea is that you can much more quickly edit files in your site - especially Web Connection Scripts or Templates - and immediately see the change reflected in the browser without having to explicitly navigate or refresh the browser.

Using BrowserSync you can have your code and a live browser window side by side and as you make changes and save, you can immediately see the result of your change reflected in the browser. It's a very efficient way to work.

When you create a new project, Web Connection now creates a BrowserSync.prg that's properly configured for your project. Assuming browser-sync is installed, this file will:

  • Launch Browser Sync on the Command Line
  • Navigate your browser to the appropriate site and port
  • Start your FoxPro server as a PRG file (DO yourAppMain.prg)

There's more information on what you need to install BrowserSync in the documentation:

Using BrowserSync during Development to Live Reload Changes

New Project Automatically Create a GIT Repository

If Git is installed on the local machine the new Project Wizard now automatically sets up Git Repository and makes an initial commit. New projects include a FoxPro and Web Connection specific .gitignore and .gitattributes file.

This is very useful especially if you just want to play around with a project as it allows you to make changes to the newly created project and then simply rollback to the original commit to get right back to the original start state.

It's also quite useful for samples that update existing applications. For example, I recently created the User Security Manager and using the intial commit and the after integration Git lets you see very easily exactly what changes the update integration Wizard makes to get the new project running.

As a side note, Web Connection projects are very Git friendly since they typically don't include VCX files. With the v7.0 changes away from VCX wwBusiness, the last vestige of visual classes has been removed. If you use visual classes you'll need some additional tooling like FoxBin2Prg to convert visual classes to text that Git can work with for comparison and merging.

Code Snippets for Visual Studio and Visual Studio Code

Another big push in this release has been to improve integration into Development IDE's. Web Connection 7 now ships with a number of Intellisense code snippets for Visual Studio and Visual Studio Code. In both development environments you now have a host of code snippets that start with wc- to help inject common Web Connection Html Helpers as well as common HTML and Bootstrap constructs and full page templates (ie. wc-template-content-page).

In Visual Studio:

And in Visual Studio Code:

The Visual Studio Add-in also has a number of enhancements that allow hooking up an alternate code editor to view your process class code (I use Visual Studio Code for that these days).

Fixing a Script Page Path Dependency

Another highlight for me is that Web Connection Script pages that use Layout pages no longer hard code the script page path into the script page. This fixes a long standing issue that caused problems when you moved script files and specifically compiled FXP files between different locations.

In v7.0 the hard coded path is no longer present which means you can now compile your script pages on your dev machine and ship them to the server without worry about path discrepancies.

The old code used to do this sort of thing:

The result of this was that you'd get content page PRG files that had something like this:

LOCAL CRLF
CRLF = CHR(13) + CHR(10)

 pcPageTitle = "Customers - Time Trakker" 

 IF (!wwScriptIsLayout)
    wwScriptIsLayout = .T.
    wwScriptContentPage = "c:\webconnectionprojects\timetrakker\web\Customers.ttk"
    ...
ENDIF

The hard coded path is now replaced by a variable that is passed down from the beginning of the script processing pipeline which is ugly from a code perspective (a non-traceable reference basically), but clearly preferrable over a hardcoded path generated at script compilation time.

It's a small fix, but one that actually has caused a number of mysterious failures for many people that was difficult to track down because it would tell you that the script was not found even though the path presumably was correct.

So yes, this a small but very satisfying fix...

Markdown Improvements

There are also a number of improvements related to Markdown processing in Web Connection. You probably know that Web Connection ships with a MarkdownParser class that has a Markdown() method you can use to parse Markdown into HTML. The MarkdownParser class provides additional control over what features load and what processing options are applied, but in essence all of that provides basic Markdown parsing features.

Web Connection 7.0 adds default support HTML Sanitation of the generated HTML content. Markdown is a superset of HTML so it's possible to embed script code into Markdown, and SanitizeHtml() is now hooked into the Markdown processor by default to strip out any script tags, JavaScript events and javascript: urls.

SanitizeHtml() is now also available as a generic HTML sanitation method in wwUtils - you can use it on any user captured HTML input to strip script code.

Web Connection 7.0 also includes a couple of new Markdown Features:

  • Markdown Islands in Scripts and Templates
  • Markdown Pages that can just be dropped into a site

Markdown Islands

Markdown Islands are blocks of markdown contained inside of a <markdown></markdown> block and is rendered as Markdown.

You can now do things like this:

<markdown>
   Welcome back <%= poModel.Username %>

   ### Your Orders
   <% 
      SELECT TOrders 
      SCAN
   %>
      **<%= TOrders.OrderNo %>** - <%= FormatValue(TOrders.OrderDate,"MMM dd, yyyy") %><% ENDSCAN %></markdown>

You can now embed script expressions and code blocks inside of Markdown blocks and they will execute.

Note that there are some caveats: Markdown blocks are expanded prior to full script parsing and any Markdown that is generated is actually embedded as static text into the page. The script processor then parses the rendered markdown just like it does any other HTML markdown on the page.

Markdown Pages

Markdown Pages is a new feature that lets you drop any .md file into a Web site and render that page as HTML content in your site - using the default

This is a great feature for quickly creating static HTML content like documentation, a simple blog, documents like about or terms of service pages and so on. Rather than creating HTML pages you can simple create a markdown document and drop it into the site and have it rendered as HTML.

For example, you can simply drop a Markdown file of a blog post document into a folder like this:

http://west-wind.com/wconnect/Markdown/posts/2018/09/25/FixWwdotnetBridgeBlocking.md

which results in a Web page like this:

All that needs to happen to make that work is dropping a markdown file into a folder along with its dependent resources:

You can customize how the Markdown is rendered via a Markdown_Template.wcs script page. By default this page simply renders using nothing more than the layout page as a frame with the content rendered inside of it. But the template is customizable.

Here's what the default template looks like:

<%
    pcPageTitle = IIF(type("pcTitle") = "C", pcTitle, pcFilename)
%><% Layout="~/views/_layoutpage.wcs" %><div class="container"><%= pcMarkdown %></div><link rel="stylesheet" href="~/lib/highlightjs/styles/vs2015.css"><script src="~/lib/highlightjs/highlight.pack.js"></script><script>
    function highlightCode() {
        var pres = document.querySelectorAll("pre>code");
        for (var i = 0; i < pres.length; i++) {
            hljs.highlightBlock(pres[i]);
        }
    }
    highlightCode();</script>

Three values are passed to this template:

  • pcTitle - the page title (parsed out from the document via YAML header or first # header)
  • pcFileName - the filename of the underlying .md file
  • pcMarkdown - the rendered HTML from the Markdown text of the file

Authentication and Security Enhancements

Security has been an ongoing area of improvement in Web Connection. Security is hard no matter what framework you use and Web Connection is no exception. Recent versions have gained many helper methods that make it much easier to plug in just the component so of the authentication system that you want to hook into or replace.

In this release the focus has been in making sure that all the authentication objects are in a consistent state when you access them. If you access cAuthenticatedUser, lIsAuthenticated, cAuthenticatedUsername, oUserSecurity and oUser and so on, Web Connection now makes sure that the current user has been validated. Previously it was left up to the developer to ensure that either Authenticate() or OnCheckForAuthentication() was called to actually validate the user and ensure the various objects and properties are set.

In v7.0 when you access any of these properties an automatic authentication check is performed that ensures that these objects and values are properly checked before you access them without any explicit intervention by your own code.

Another new feature is auto-encryption of passwords when the cPasswordEncryptionKey is set. You can now add non-encrypted passwords into the database and the next time the record is saved it will automatically encrypt the passwords. This allows an admin user the ability to add passwords without having to pre-hash them and it also allows legacy user security tables to automatically update themselves to encryption as they run.

New User Security Manager Addin Product

In parallel with the release of Web Connection 7.0 I'm also releasing a separate product, the User Security Manager for Web Connection which provides a complete user authentication and basic user management process as an addin Web Connection process class. The addin process class takes over all authentication operations besides the core authentication which is shared between your application process class(es).

The Security Manager is a drop in process class which means all the logic and code related to it is completely seperate from your application's process class(es). All authentication operations like sign in, sign out, account validation, password recovery, profile creationg and editing and user management are all handled completely independently.

In addition the library provides the base templates for enhanced login, profile editing, password recovery, account validation and the user manager. These templates are standard Web Connection script pages and they are meant to be extended if necessary with your own custom fields that relate to your user accouts.

You can find out more on the USer Security Manager Web site:

User Security Manager for Web Connection

What about breaking changes?

As I mentioned whenever these large upgrades become due we spend a bit of time to find the balance between new features, refactoring out unused features and breaking backwards compatibility.

Given the many enhancements and features in this v7.0 release the breaking changes are minimal, and for the most part require only simple fixes.

The core areas are:

  • Bootstrap and FontAwesome Updates in the Templates
  • VCX to PRG Class Migrations
  • Deprecated classes

Out of those the HTML Bootstrap update is easily the most severe - the others are mostly simple search and replace operations with perhaps a few minor adjustments.

There's a detailed topic in the help file that provides more information on the breaking changes:

Breaking Changes: Web Connection 7.0 from 6.x

More and more

There's still more and to see a complete list of all the changes that have been made check out the change log:

Web Connection Change Log

Summary

As you can see there's a lot of new stuff, and a lot of exciting new functionality in Web Connection 7.0. I'm especially excited about the project related features and easier launching of applications, as well as BrowserSync, which I've been using for the last month and which has been a big productivity boost.

So, check out Web Connection 7.0 and find your favorite new features.

this post created and published with Markdown Monster

Returning an XML Encoded String in .NET

$
0
0

XML is not as popular as it once was, but there's still a lot of XML based configuration and data floating around today. Just today I was working with a conversion routine that needs to generate XML formatted templates, and one thing that I needed is an easy way to generate a properly encoded XML string.

Stupid Pet Tricks

I'll preface this by saying that your need for generating XML as standalone strings should be a rare occurrance. The recommendation for generating any sort of XML is to create a proper XML document XmlWriter or Linq to XML structure and create your XML that way which provides built-in type to XML conversion.

In most cases you'll want to use a proper XML processor whether it's an XML Document, XmlWriter or LINQ to XML to generate your XML. When you use those features the data conversion from string (and most other types) is built in and mostly automatic.

However, in this case I have a huge block of mostly static XML text and creating the entire document using structured XML documents seems like overkill when really i just need to inject a few simple values.

So in this case I'm looking for a way to format values as XML for which the XmlConvert static class works well.

Should be easy right? Well...

The XMLConvert class works well - except for string conversions which it doesn't support. XmlConvert.ToString() works with just about any of the common base types except for string to convert properly XML formatted content.

Now what?

##AD##

Reading an encoded XML Value

There are a number of different ways that you can generate XML output and all of them basically involve creating some sort of XML structure and reading the value out of the 'rendered' document.

The most concise way I've found is the following:

public static string XmlString(string text)
{
    return new XElement("t", text).LastNode.ToString();
}

which you can call with:

void Main()
{
    XmlString("Brackets & stuff <> and \"quotes\" and more 'quotes'.").Dump();
}

and which produces:

Brackets &amp; stuff &lt;&gt; and "quotes" and more 'quotes'.

If you don't want to use LINQ to XML you can use an XML Document instead.

private static XmlDoc _xmlDoc;

public string XmlString(string text)
{
	_xmlDoc = _xmlDoc ?? new XmlDocument();
	var el = _xmlDoc.CreateElement("t");
	el.InnerText = text;
	return el.InnerXml;
}

Note that using XmlDocument is considerably slower than XElement even with the document caching used above.

System.Security.SecurityElement.Escape()?

The SecurityElement.Escape() is a built-in CLR function that performs XML encoding. It's a single function so it's easy to call, but it will always encode all quotes without options. This is OK, but can result in extra characters if you're encoding for XML elements. Only attributes need quotes encoded. The function is also considerably slower than the other mechanisms mentioned here.

Just Code

If you don't want to deal with adding a reference to LINQ to XML or even System.Xml you can also create a simple code routine. XML strings really just escape 5 characters (3 if you're encoding for elements), plus it throws for illegal characters < CHR(32) with the exception of tabs, returns and line feeds.

##AD##

The simple code to do this looks like this:

///  <summary>
///  Turns a string into a properly XML Encoded string.
///  Uses simple string replacement.
/// 
///  Also see XmlUtils.XmlString() which uses XElement
///  to handle additional extended characters.
///  </summary>
///  <param name="text">Plain text to convert to XML Encoded string</param>
/// <param name="encodeQuotes">
/// If true encodes single and double quotes.
/// When embedding element values quotes don't need to be encoded.
/// When embedding attributes quotes need to be encoded.
/// </param>
/// <returns>XML encoded string</returns>
///  <exception cref="InvalidOperationException">Invalid character in XML string</exception>
public static string XmlString(string text, bool encodeQuotes = false)
{
    var sb = new StringBuilder(text.Length);

    foreach (var chr in text)
    {
        if (chr == '<')
            sb.Append("&lt;");
        else if (chr == '>')
            sb.Append("&gt;");
        else if (chr == '&')
            sb.Append("&amp;");
        // special handling for quotes
        else if (encodeQuotes && chr == '\"')
            sb.Append("&quot;");
        else if (encodeQuotes && chr == '\'')
            sb.Append("&apos;");
        // Legal sub-chr32 characters
        else if (chr == '\n')
            sb.Append("\n");
        else if (chr == '\r')
            sb.Append("\r");
        else if (chr == '\t')
            sb.Append("\t");
        else
        {
            if (chr < 32)
                throw new InvalidOperationException("Invalid character in Xml String. Chr " +
                                                    Convert.ToInt16(chr) + " is illegal.");
            sb.Append(chr);
        }
    }

    return sb.ToString();
}

Attributes vs. Elements

Notice that the function above optionally supports quote encoding. By default quotes are not encoded.

That's because elements are not required to have quotes encoded because there are no string delimiters to worry about in an XML element. This is legal XML

<doc>This a "quoted" string. So is 'this'!</doc>

However, if you are generating an XML string for an attribute you do need to encode quotes because the quotes are the delimiter for the attribute. Makes sense right?

<doc note="This a &quot;quoted&quot; string. So is &apos;this&apos;!"

Actually, the &apos; is not required in this example because the attribute delimiter is ". So this is actually more correct:

<doc note="This a &quot;quoted&quot; string. So is 'this'!"

However, both are valid XML. The string function above will encode single and double quotes when the encodeQuotes parameter is set to true to handle setting attribute values.

The following LINQPad code demonstrates:

void Main()
{
	var doc = new XmlDocument();
	doc.LoadXml("<d><t>This is &amp; a \"test\" and a 'tested' test</t></d>");	
	doc.OuterXml.Dump();
	var node = doc.CreateElement("d2");
	node.InnerText = "this & that <doc> and \"test\" and 'tested'";
	doc.DocumentElement.AppendChild(node);
	var attr = doc.CreateAttribute("note","this & that <doc> and \"test\" and 'tested'");
	node.Attributes.Append(attr);
	doc.OuterXml.Dump();
}

The document looks like this:

<d><t>This is &amp; a "test" and a 'tested' test</t><d2 note="this &amp; that &lt;doc&gt; and &quot;test&quot; and 'tested'">
    	this &amp; that &lt;doc&gt; and "test" and 'tested'</d2></d>

Bottom line: Elements don't require quotes to be encoded, but attributes do.

##AD##

Performance

This falls into the pre-mature optimization bucket, but I was curious how well each of these mechanisms would perform relative to each other. It would seem that XElement and especially XmlDocument would be very slow as they process the element as an XML document/fragment that has to be loaded and parsed.

I was very surprised to find that the fastest and most consistent solution in various sizes of text was XElement which was faster than my string implementation. For small amounts of text (under a few hundred characters) the string and XElement implementations were roughly the same, but as strings get larger XElement started to become considerably faster.

Not surprisingly XmlDocument - even the cached version - was the slower solution. With small strings roughly 50% slower, with larger strings many times slower and incrementally getting slower as the string size gets larger.

Surprisingly slowest of them all was SecurityElement.Escape() which was nearly twice as slow as the XmlDocument approach.

Whatever XElement is doing to parse the element, it's very efficient and it's built into the framework and maintained by Microsoft, so I would recommend that solution, unless you want to avoid the XML assembly references in which case the custom solution string works as well with smaller strings and reasonably close with large strings.

Take all of these numbers with a grain of salt - all of them are pretty fast for one off parsing and unless you're using manual XML encoding strings in loops or large batches, the perf difference is not of concern here.

If you want to play around with the different approaches, here's a Gist that you can load into LINQPad that you can just run:

Summary

XML string encoding is something you hopefully won't have to do much of, but it's one thing I've tripped over enough times to take the time to write up here. Again, in most cases my recommendation would be to write strings using some sort of official XML parser (XmlDocument or XDocument/XElement), but in the few cases where you just need to jam a couple of values into a large document, nothing beats simple string replacement in the document for simplicity and easy maintenance and that's the one edge, use-case where a function like XmlString() makes sense.

Resources

Web Connection Security

$
0
0

Prepared for:Southwest Fox
October 2018

Security should be on every Web developer's mind when building a new Web application or enhancing an existing one. Not a day goes by that we don't hear about another security breach on some big Web site with scads of customer data compromised.

Security is hard

Managing Web site security is never easy as there are a lot of different attack vectors and if you are new to Web development it's very easy to miss even simple security precautions.

The good news is that the majority of security issues can be thwarted by a handful of good practices which I'll cover in this paper. But keep in mind that this is not all the things that can go wrong. I'm no security expert either but I've been around Web applications long enough to have seen most of the common attack vectors and know how to deal with them. But that's not to say that I have all the answers and this paper isn't meant to be an end all security document. If you are serious about security you should look at specific courses that deal explicitly with Web security, or even go as far as hiring a security specialist that can assess the state of security of your Web site.

Security is also an ongoing topic, something that needs to be kept up with. Attack vectors change over time, as do the tools you use to build and run your Web sites.

The main takeaway from this short introduction is that Security is serious business and you should think about it right from the moment you start building your application, while you are adding new features and when it is up and running even when it is 'done'. Be vigilant.

Web Connection and Security

West Wind Web Connection is a generic Web framework that provides an interface for FoxPro to interact with a Web Server - IIS Primarily - on Windows. Web Connection provides a rudimentary set of security features, but it is not and never was intended as a complete security solution.

Part of this is because the majority of security related issues have little to do with the actual application itself and deal more with network management and IT administration.

The focus of this paper is on the things that are important to a Web Connection application and that you as a developer using Web Connection and building a Web application have to think about.

Here's what I'm going to cover:

  • Web Security
    • Web Server Security - IIS
    • TLS Encryption
    • Authentication
  • Physical Access & Network
    • Who can get at the box?
    • Who can hack into the system
    • File system Permissions
    • Web Application Identity
  • Operating System
    • Who can access files on the machine
  • Middleware Technology
    • Who can hi-jack the application
    • Spoofing

Web Server and Site Security

The first step is making sure that your Web Server and your Web Site are secure. Most of the issues around this are related to setup configuration of IIS and the specific Web site you are creating.

IIS Security

The first line of defense involves the Web Server which in most cases for a Web Connection application will be Microsoft's built-in IIS server. IIS 7 and later is secure by default which means that when you install the Web Server it actually installs with very minimal features. The base install basically can serve static files and nothing more.

In order to configure IIS for Web applications and Web applications specifically you need to add a number of additional components that enable ASP.NET and or ISAPI, Authentication and some of the Administration features.

Figure 1 - Core features required for a Web Connection IIS installation

The key things are:

  • ASP.NET or ISAPI
    These are the connector interfaces that connects Web Connection to IIS. You only need one or the other to run, but both are supported in Web Connection and can be switched with simple configuration settings. The .NET module is the preferred mechanism which sports the most up to date code base and much more sophisticated administration features.

  • Authentication
    In order to access the Web Connection administrative features and to perform the default admin folder blocking, Web Connection uses default Windows authentication. If you use .NET you only need to install Windows Authentication, but Basic Authentication can also be used. Both of these auth mechanisms are tied to Windows user accounts. Web Connection also provides application level security features that are separate from either of these mechanisms (more on that later).

  • IIS Management
    In order for the Web Connection tools to configure IIS you need to have the IIS Management tools enabled, so you need to ensure the IIS Management Console is installed as well as the IIS 6 Metabase compatibility feature, which is a COM/ADS based IIS adminstration interface that's used by most tools.

How IIS and Web Connection Interact

A key perspective for understanding IIS Web Security from an application execution perspective is to understand how IIS and your Web Connection use Windows Identity while the application is executing.

It's all about Identity

The Windows Identity deteremines the rights that your application has on the Windows machine it is running on. A Web application's requests transfer through a number of Windows processes and each one has a specific Identity assigned to it.

Identity is crucial to system security because it determines what your Web application can access on the local machine and potentially on the network. The higher the access rights, the higher risk that if your application is compromised that some damage can be inflicted on the entire machine. The key is is if your application is compromised.

There's an inverse relationship between how secure your application is and how much effort you have to put in to use more limited accounts. Using a high permissions account like SYSTEM or an Admin account lets your application freely access the entire machine, but it if there ever is a problem it also lets a hacker access your entire machine freely. If you choose to run under a more limited security scheme you have to explicitly expose each location on disk and the possibly the network that the application has access to.

Realize that clamping down security may not help you prevent access to data that your application uses anyway in case of an attack. Your application needs to have access, so in case of a security compromise that means a potential hacker also has access. Still, it's a good idea to minimize rights as much as possible by using a lower rights account and explicitly setting access where it's needed.

Web Connection Uses SYSTEM by Default: Change it for Production

When a new Web Connection application is created, Web Connection by default sets the Identity to SYSTEM which is a full access account on Windows. WWWC does this because SYSTEM is the only generic account in Windows that has the rights to just work out of the box when running in COM mode. Any other account requires some configuration. The setup routines are meant to configure a development machine initially and are not meant for production. For production choose a specific account, or NETWORK SERVICE and provide explicit system rights required by your application.

IIS and FoxPro

Let's drill in a little closer to understand where Identity applies. For IIS and Web Connection there are two different processes that you are concerned with and each can, but doesn't have to, have it's own process Identity:

  • The IIS Application Pool
  • Your FoxPro Exe Server

For Web Connection both are separate EXEs and each can have their own identity.

Use Launching User Passthrough Identity for FoxPro Server

I recommend you never explicitly set the identity of your FoxPro EXE (in DCOMCnfg), but rather use the default, pass-through security of the Launching User that is used when custom DCOM Identity is applied. By doing so you only need to worry about the Identity of the Application Pool and not that of your FoxPro EXE.

The Process and Identity Hierachy

Figure 2 shows the different processes that are involved when running an IIS Web Server:

Figure 2 - IIS and Web Connection in the Context of Windows

IIS is a Windows Web Server so everything is hosted within the context of the Windows OS. All the boxes you see in Figure 2 are processes.

IIS Administration Service

The IIS Admin service is a top level service and somewhat disconnected system service that is responsible for launching Web Sites/Application Pools and monitoring them. When IIS starts or when you recycle IIS as a whole or an individual Application Pool you are interacting with the IIS Admin service. It's responsible for making sure that Web sites get started, keep running and monitors individual application pools for the various process limits you can configure in the Application Pool configuration. This service sits in the background of Windows and is internal to it - you generally don't configure or interact with it directly except when you use the Management Console, or IISRESET .

Application Pool

Application Pools are the base process, an EXE that one or more Web sites are hosted in. You can configure many application pools in IIS and you can add 1 or more Web sites to an application pool. Generally it's best to give mission critical applications their own application pool, while it's perfectly fine for many light use or static Web sites to be sharing a single Application Pool.

An application pool executes as an EXE: w3wp.exe. When you are running IIS and you have active clients you can see one or more w3wp.exe

Figure 3 - Application Pools (w3wp.exe) and Web Connection EXE are separate processes with their own identity

I think of an Application Pool as the Web application and I like to set the Identity of the Application Pool in the Application Pool settings as the only place where Identity is set. Instead, I use the default passthrough security for any processes that are launched from the application pool.

Figure 4 - You can set Application Pool Identity in the Advanced Settings for the Pool

FoxPro Web Connection Server

Your FoxPro Web Connection Server runs as a seperate out of process COM EXE server or as a file based standalone FoxPro application.

File based servers always are started either as the Interactive User if you explicitly start the server from Explorer, or it is started using the Application Pools Identity.

COM servers use either the Application Pool's Identity - which I highly recommend - or the Identity you explicitly assign in DCOMCnfg. I really want to dissuade you from setting Identity in DcomCnfg simply because it can get very confusing what's running what. The only time that makes sense if you really want your IIS process and your FoxPro COM server to use different accounts.

The idea scenario is that the default DCOM Identity configuration is use which is the Launching User using DcomCnfg:

Figure 5 - DcomCnfg lets you set the identity of your FoxPro server. Don't do it unless you have a good reason

Note that Figure 5 shows the default so you never have to explicitly set the Launching User. Only set this setting if you are changing the Identity to something else.

Make sure to use the 32 bit version of DcomCnfg:
MMC comexp.msc /32

When do you need DcomCnfg?

One big frustration with Web Connection is that it runs EXE server that might need configuration. If you are using the default setup for Web Connection which uses the SYSTEM account no DCOM Configuration is required.

No DCOM Configuration is required for:

  • SYSTEM
  • Administrator accounts
  • Interactive

All other accounts have to configure the DCOM Access and Launch and Activation settings to allow specific users to launch either your COM server specifically or COM servers generically on the machine.

Figure 6 - Setting Launch and Access and Activate for a DCOM Server

These permissions can either be set on the specific server as shown here, or at the Local Machine level in which case they are applied to launching all EXE servers. In this example, I'm explicitly adding NETWORK SERVICE to the the permissions. Both Launch and Access (shown) and Activation have to be set.

Network Service as a Production Account

For production machines I often use Network Service because its a low rights, generic account that has to be explicitly given access everywhere, but it's generic and doesn't require a password nor requires configuration of a special user account which makes your configuration more portable.

Beware of the ApplicationPoolIdentity

IIS by default creates new accounts using ApplicationPoolIdentity which is a dynamic account that has no rights on the local machine at all. You can't even set permissions for it in the Windows ACL dialogs. This account is meant for static sites that don't touch the local machine in any way and they are not appropriate for use of Web Connection. You will not be able to launch a COM Server or even a file server from the Web server with it.

Identity and your Application

Once your security is configured your application runs under a specific account and that account is what has access to the disk and other system services. If your app runs under NETWORK SERVICE, so you won't be able to write HKEY_LOCAL_MACHINE in the registry for example or write a file into the c:\Windows\System32 directory.

The goal is to allow access only in application specific locations so that if your application is compromised in any way at worst you can damage your own application and the user can't take over the entire machine. If you run as SYSTEM, it is possible for the attacker to potentially plant malware or other executing code that monitors your machine and sends data off to somewhere else.

It all boils down to this:

Choose an account to run your application that has the rights that your application needs to run and nothing more

File System Security

Related to the process identity is File System security. The file system is probably the most vulnerable aspect when it comes to attempted hack attempts. Hackers love to exploit holes in applications that allow any sort of file uploads that might allow them to plant an executable in the file system, and the somehow execute that file to compromise security or access your data.

The best avenue to thwart that sort of scenario is to minimize file permissions as much as possible.

Choose a limited Application Account

A lot of this was discussed in the Application Pool security section where I discussed using a low rights account and then giving it just the rights needed to run the application. Once you have a low rights account start with minimal permissions needed and very selectively give WRITE permissions.

Web Folders
  • Read/Execute Permissions in the Web Folder
  • Read/Write for web.config or wc.ini in Web Folder
    to persist Admin page configuration settings (optional)
Application Folder
  • Read/Execute in the Application/EXE folder
  • Read/Write access in Data Folders
  • Better: Don't use local data, but a SQL Backend for Data Access

Isolate your Data

In addition to system file access you also have to worry about data breaches. If you're using local or network FoxPro data you need to worry about those data locations.

Don't allow direct access from the Internet

This seems pretty obvious but any data you access from your application should only be accessible internally with no access from the Internet. Don't put data into a Web accessible path inside of your Web site. Always put data files into a completely separate non-Web accessible folder hierarchy.

Web Connection by default uses this structure:

Project Root
--- Data                 Optional Data Folder
--- Deploy               Application Binaries
--- Web                  Mapped Web Folder

This is just a suggestion, but whatever you do, never put data files (or anything else that is sensitive) into the Web folder. It's acceptable to put data into the Deploy folder as a subfolder. Do put your data files into a self-contained folder so it's easy to move the data.

And while you're at: For God's sake don't hardcode paths in your application. Try to always use Relative Paths, and if possible use variables for path names that can be read from a configuration file. If there's ever a problem being able to move the data quickly is key and having hard coded paths makes that very difficult. Configured paths from a configuration file can be changed without making code changes.

Ideally for security data should not be stored locally on the server, but rather sit on another machine that is not otherwise Internet accessible. The other machine should be on the internal network only or be accessible only via VPN. Make it so only your application account has access.

Use a SQL Backend on a Separate Server

An even better solution is to remove physical data entirely from the equation and instead storing your data inside of a SQL backend of some sort with the only way to access the data via username/password in the connection string that's encrypted.

As with data files, you want to make sure that the SQL backend is not exposed directly to the Internet. SQL Server by default doesn't allow remote access, but you can lock it down to specify which IP addresses or subnets have access. Likewise databases like MongoDb let you cut off internet access completely. Either way make sure that you use complex username and password sequences that are hard to break and store passwords in a safe place - encrypted if possible.

Protecting your Data

The next thing you'll want to do is ensure that your server is not leaking data and that the data you do send to others is secure and can't be spied upon.

Certificates: Protected Traffic on the Wire

The data you send over the wire may be sensitive or confidential. Or it's as simple as the fact that you log into a Web site and you send a username and password and that data has to be secure.

Web Server Certificates are meant to address this issue by encrypting all content that is transmitted over the Web connection. Both data you send and the data that comes back is encrypted using strong public key cryptography which makes it nearly impossible to spy on traffic as it travels over the wire.

Intercepting HTTP traffic is easier than you might think. Using little more than a network analyzer it's possible to siphon packets off the network and piece together requests if they are not encrypted. Worse there are hardware devices out there that can pose as a WiFi access point that capture network packets and then pass them on to another router as if nothing was wrong. Encryption of content over HTTPS prevents most of the attack vectors for this type of attack.

TLS (Transport Layer Security) addresses these issues by encrypting your content in such a way that your browser and the server are the only ones that can decrypt the content that travels over the wire making it very difficult for anybody listening in on the conversation 'en route' to get useful data out of the network packets.

TLS is for Security only not for Validation

One important thing to understand about TLS encryption and certificates is that the purpose of certificates is to encrypt content on the wire.

There are a couple of different 'grades' of certificates:

  • Standard Certificates (Instance Domain Validated)
  • Extended Validation (EV) Certificates

Contrary to what the big SSL Service companies like Verisign, Commodo, Digicert etc. want you to believe, certificates are not meant to serve the purpose of validation for a specific site. But 'Extended Validation' certificates purport to do this by requiring the registrant to go through an extra validation process that is not required for standard Certificates. Standard Certificates are validated simply by checking that the DNS for the domain is valid and matches the signature of the certificate request.

EV Certificates are a lot more expensive, especially now that Standard certificates are effectively free from LetsEncrypt (more on that in a minute). There's no difference between a standard certificate from LetsEncrypt or Verisign or Commodo - they all use the same level of encryption and the same level of DNS validation for example. EV certs do offer the green company name in the address bar, but if you check amongst the most popular sites on the Web you'll find that very few even very big companies bother to use these EV certificates. It's really just wasted money.

Wildcard Domains

If you need to secure an entire domain and all of its sub sites - ie. support.west-wind.com, markdownmonster.west-wind.com, store.west-wind.com, west-wind.com - you can use a Wildcard Certificate. Wildcard certificates let you bind a single certificate to any sub-domain and they are nice if you have a ton of subdomains, and absolutely essential if you run a multi-tenant Web site that uses subdomains.

For example, Markus Egger and I run kavadocs.com which lets users create subdomains for their own documentation sites: websurge.kavadocs.com, westwind-utilities.west-wind.com and so on are all bound to the single wildcard domain and managed through a single wildcard DNS entry that maps back to an Azure Web site. The application can then read the SERVER_NAME Server Variable to determine the target domain and handle requests for that particular tenant.

LetsEncrypt has been offering free certificates for a few years now and I've been running on those for the last 2 years. LetsEncrypt also started offering free wildcard domain certificates earlier this year so that makes it even easier to handle multi-domain web sites more easily.

HTTPS is no longer an Option

If you plan on running a commercial Web site of any sort, plan on using HTTPS for the site. Even if you think there's nothing sensitive about your site of cat pictures, there are good reason to always use HTTPS for your requests.

  • It's easy: No changes required on your Web site
  • It's more secure (Doh!)
  • It's free
  • Non secure sites are ranked lower on Search Engines
No Web Site Changes required

Switching a site to run from plain HTTP to HTTPS doesn't require any changes. HTTPS is simply a protocol change which means the only difference is that the URL changes from http://mysite.com to https://mysite.com. Assuming your code and links are not explicitly hardcoding URLs - which it definitely should not - you shouldn't need to make any changes. You can easily switch between HTTP and HTTPS and behavior should otherwise be the same.

TLS Certificates are now Free and Easy thanks to LetsEncrypt

A few years ago, Mozilla and consortium of industry players got together and created a free certificate authority called LetsEncrypt. LetsEncrypt provides domain specific TLS certificates for free using an open organization rather than a commercial entity to provide this service. What this means is that the service is totally free, no strings attached and it's designed to stay that way as it is not a commercial venture but rather an not-for-profit consortium of organizations that promote security on the Web.

LetsEncrypt makes Certificates Easy To Manage

In the past both price and certificate requests and installation was a pain, but LetsEncrypt also helps with the process. Not only are LetsEncrypt Certificates free, they are also very easy to install, revoke and renew. LetsEncrypt provides a set of public APIs that are used to make certificate requests and this ACME protocol framework provides a standards set of tools to manage the entire certificate creation, validation, revokation and renewal process.

There are tools for almost any platform that makes it easy to integrate with LetsEncrypt. On Windows there's an open source tool called Win-Acme (formerly called LetsEncrypt-Win-Simple) which makes it drop dead simple to create a certificate and install it into IIS. It's so easy you can do it literally in less than 5 minutes.

Let's walk through it:

  • Download the latest Win-Acme release from:
    https://github.com/PKISharp/win-acme/releases

  • Unzip the Zip file into a folder of your choice

  • Open an Administrative Powershell or Command Prompt

  • cd into the install folder

  • run .\letsencrypt

In the following example I'm creating a new certificate to one of my existing sites samples.west-wind.com. Before you do this make sure your DNS is set up and your site is reachable from the Internet using its full domain name.

Once you do this here's what running LetsEncrypt looks like:

Figure 7 - Executing Win-Acme LetsEncrypt from the Commandline

In this run I create a single site certificate so I just Create New Certificate, then choose Single Binding, then pick my site from the list (10 in this case). And that's it.

LetsEncrypt then goes out and uses the ACME protocol to make a new certificate request which involves creating the request and putting some API related data into a .well-known folder that LetsEncrypt checks to verify the domain exists and matches the machine that the certificate request originates from. LetsEncrypt calls back and verifies the information and if that's good issues a new certificate that is passed back to the client. The client then takes the completed certificate, imports it into IIS and creates the appropriate certificate mapping on your selected Web site.

Et voila! In all of 3-5 minutes and no manual interaction at all, you now have a new certificate on the site:

Figure 8 - A valid LetsEncrypt TLS Certificate on the site

and in IIS:

Figure 9 - LetsEncrypt automatically bind the certificate into IIS

LetsEncrypt also installs a scheduled task that once a day checks for certificates that are within a few days of expiring and automatically renews them. LetsEncrypt is smart enough to not renew or replace certificates that are already installed unless you use a --forcerenewal command line switch.

With certificates being free and ridiculously easy to install there's no reason not to install SSL certificates

Search Engines optimize Secure Sites

Google and Bing a couple of years ago started optimizing search rankings based on whether sites are secure. Non-secure sites are ranked down over secure sites with similar content.

This alone ought to be enough reason for any commercial site to use HTTPS for all requests.

Forcing a Site to use SSL

When you type a URL into a browser by default the URL is an http url. Recently browsers started to check for https first, then try http if that failed however that doesn't seem to be 100% reliable. You'll want to make sure that your site always returns HTTPS content.

The easiest way to do that is by using a Url Rewrite Rule. IIS has an optional tool called UrlRewrite that can be installed that allows you to apply a set of rules to rewrite any URL that comes into your site. Unfortunately UrlRewrite is not a native IIS component, so you have to install it first. Easiest is to install it with Chocolatey:

choco install UrlRewrite

Alternately you can install it with the IIS Platform Installer from this download link:

Once installed, UrlRewrite Rules can either be created in the IIS Admin UI, or you can directly add rules into the Web site's web.config file.

<configuration><system.webServer><rewrite><rules><rule name="Redirect to HTTPS" stopProcessing="true"><match url="(.*)" /><conditions><add input="{HTTPS}" pattern="^OFF$" /></conditions><action type="Redirect" url="https://{HTTP_HOST}/{R:1}" redirectType="SeeOther" /></rule></rules></rewrite></system.webServer></configuration>

This rule basically checks every URL that is not running https:// by checking the HTTPS header for a value of OFF (ie. it's not HTTPS). If it is off the URL is rewritten with the new protocol prepended to the host and the captured site relative path.

Once this rule is active any request to http:// is automatically re-routed to https://.

Note that you may also want to install a local, self-signed certificate in IIS for your local development so that your live and local dev environment both use HTTPS.

Just Do It

If you've been holding off using HTTPS, the time is now! Using LetsEncrypt makes the process of creating a new certificate and getting it into IIS ridiculously easy and best of all it's free.

5 minutes and no money down - what could be easier? You have everything to gain and nothing to lose.

File System Security

We already discussed Identity and how it affects file access, but let's turn this around and look at this from the application perspective. Each Web application is made up of a folder hierarchy(ies) which the application needs to access.

The golden standard for file system security is use rights that you and nothing more

In file system terms this usually means you need to make sure your Web application can access:

  • Your Application Folder (read/execute)
  • Your Data Folder if using FoxPro data (read/write)
  • Your Web Folder (read/execute)

Use a non-Admin Account

If you want to be secure everything starts by using a non Admin/non SYSTEM account that by default has no rights anywhere on the machine. Essentially, with an account like that you are white listing the exact folders that are allowed access and keep everything else off limits. If you build a single self contained application this should be easy to do. It gets more complicated if you have an application that needs to interact with other components or applications that also live on the same system. You should try to minimize these but even if that's the case you would still selectively enable rights as needed.

Minimize User Accounts

Remove or disable any user accounts on a server that are not used. Any user account is a potential attack vector. Windows won't create extra accounts but if you're using a shared server that's probably not an option. Even on shared machines make sure you know what each account is for and minimize what's there.

For Web Servers I recommend you don't expose domain accounts unless you need them to log into admin functions of the application. Using local accounts and duplicating them is a much safer choice to avoid potential corruption. THere should be very little need to use Windows Security on a Web server with the exception of the West Wind Web Connection Administration features. If you really want to you can even switch that to ASP.NET Forms Authentication with auth info stored inside of web.config.

NTFS File/Directory Permissions

IIS recognizes Windows ACL permissions on files and directories and again the Identity of your application is crucial here. There are two accounts that need to have rights to access a Web Site:

  • The Application Pool Identity has to have Read/Execute rights
  • The IUSR_ Account is required for Anonymous users to access the Web site

If you have any specific users you want to lock out you can remove or explicitly block the IUSR_ account. Web Connection does this by default to the /Admin folder which requires logging in order to be accessed because IUSR_ has been removed.

Beware of File Uploads

One of the scariest things you can do in a Web application is uploading files to a server. File uploads essentially allow a third party to bring content to your server, and you have to be extremely careful with what you do with file uploads.

The Threat of Remote Execution

The biggest concern is that somehow an executable file of some sort is uploaded, stored in a Web Folder and then executed remotely. Think for a minute that somehow a black hat is allowed to upload an ASPX page or a Web Connection script. If that is possible in any way shape or form the attacker basically has card blanche to execute code on your server, under the Idenity your application is running which is likely to be at least somewhat elevated. At the very least the attacker will access to your data, at worst if running as SYSTEM or Admin he can hack into your system and install additional malware that does much worse like install Ransomware, or install Malware that basically monitors whatever travels over the network.

Limit what can be Uploaded

The first defense with file uploads is to limit what can be uploaded. There should be no reason to ever allow binary or script files to be uploaded. Uploads should always filter both on the client and the server for the specific file types expected.

If you are expecting images, restrict to images, if you need a PDF allow only PDFs. If you need multiple files ask for a Zip file and always, always check extensions both on the client and server.

On the client use the accept attribute:

<input type="file" id="upload" name="upload"
       multiple accept="image/*" />

On the Web Connection server you can explicitly check the file names and extract the extensions to check:

*** Files must use GetMultipartFile to retreive the file name as well
loFiles = Request.GetMultiPartFiles("Upload")

FOR EACH loFile IN loFiles
	lcExt = LOWER(JUSTEXT(lcFileName))
	IF !INLIST(lcExt,"jpg","png","jpeg","gif")
	   THIS.StandardPage("Upload Error","Only image files are allowed for upload.")
	   RETURN
	ENDIF
	IF LEN(loFile.Content) > 1500000
	   THIS.StandardPage("File upload refused",;"Files over 1.5meg are not allowed for this sample...<br/>"+;"File: " + loFile.FileName)
	   RETURN
	ENDIF
	...
ENDFOR	

Never allow uploads to upload 'just anything' - always limit the supported file types to specific content types. The most common things that are uploaded are images, pdfs, and Zip files. Zip files are relatively safe since they can't be executed as is.

Never Store Executable or Script Code in Web Accessible Folders

If you allow people to upload executable code (you never should - but if you for some crazy reason do) don't allow that content to be accessible from anywhere in your Web site.

Require a Login for Uploads

Any site that allows random file uploads should always require logins so that at the very least the user had to register at some point and there's at least a minimal audit trail. Just having a login will dissuade a huge number of generic attacks because without having a compromised account there's no way to even try to find random POST and Upload links on a site by Web site scanners. Authentication is a quick and easy way to remove a bunch of malicious activity.

This holds true for most POST/PUT operations in general. Read only content is rarely a problem for hacking problems, but any operation that involves data writing has potential to attract bad operators.

Most applications easily can justify an account requirement for data updates.

System Security Summary

So far I've primarily talked about System Security that's not very specific to Web Connection. System security is vitally important for setting up and configuring your system and getting it ready to host an application.

Windows and IIS have gotten pretty good over the years of reducing the attack service for hacking drastically by minimizing what features are enabled by default and forcing Administrators to explicitly enable what they need. The Web Connection configuration tools help with this considerably in ensuring that your application is reasonably well configured right out of the gate, but you should still review the base settings.

The most important thing to always consider is the application Identity discussed earlier and applying that identity selectively. Next we'll look at application security which arguably is even more important and more relevant to developers.

Protecting your Application

System security is the underlying security issue that you need to avoid, but application security is usually the entry point for potential hacking attempts. Before system security can be compromised, 99% of the time the application has to be compromised first to even allow access to system security features.

There are a number of different aspects to this. At a high level there's authentication and access level secuity of an application that's responsible for making sure only the appropriate user can see the data that he or she has access to. Failing on this end can cause data breaches where data can be accessed in unauthorized ways.

The other issue is potential holes in the application's security that might allow the application itself to be highjacked. Maybe it's possible to somehow execute code that can then jump into the system security issues that I discussed in the last section. Remote execution hacks are among the most critical and something that any application that uses dynamic code or scripts potentially has to worry about.

Finally there's also JavaScript exploits, mostly in the form of Cross Site Scripting (XSS) attacks that can compromise user data as they are using the application. XSS attacks are based on malicious JavaScript code that has made its way into an application and then can execute malicious JavaScript code that can send off sensitive data to another server.

Web Authentication in Web Connection

Authentication is the process of logging users in and mapping them to a user account. Web Connection supports authentication in two ways.

  • Windows or Basic Authenication against Windows Accounts
    This is a quick and dirty way for authentication where you don't have to set anything up and it just works. This uses Windows accounts, but it's really appropriate only for internal network applications or for securing say an Admin area of a Web site. It's not really appropriate for general public authentication because it requires Windows accounts that have to be configured which is not very practical.

  • User Security Authentication
    This mechanism is implemented using a FoxPro class and is based around a single cookie and a matching session record for each authenticated user. This mechanism uses a class with a few simple authentication methods and stores user data in a FoxPro table. The class is meant to be overridden by applications to add custom features or store data in some other storage like SQL Server.

Authentication is managed by the wwProcess class which has a handful of methods to authenticate users and customize the login process.

The base features of mechanisms can be used interchangeably by specifying the mechanism in the Process class. Here are some of the things you can override in your Process class

*** Basic UserSecurity mode: Basic or UserSecurity
cAuthenticationMode = "UserSecurity"

It should be noted that Basic will also work with Windows Authentication if enabled on the Web server - it basically looks at IIS login information rather than the Session info UserSecurity uses.

Don't use Basic for application level Security

Basic and Windows Auth is useful for internal apps or little one of applications that you build for yourself, but for public facing sites managing users with Windows authentication is terrible. You also have very little control over the login process and you get an ugly pop up window that is not application styled. For the rest of this section we'll talk about UserSecurity Authentication only.

Forcing a LogIn

Authentication is meant to protect access to a Web Connection request or part thereof. If you want to make sure a user is authenticated, you can use the Authenticate() method to check whether the user is authenticated and if not pop up an authentication form:

FUNCTION MyProcessMethod()

*** Checks if logged in
*** If not a Auth dialog displays
IF !THIS.Authenticate("ANY")
   RETURN   && Just exit processing
ENDIF

THIS.StandardPage("Hello World",;"You're logged in as " + this.cAuthenticatedUser )

If a user hits this request an auth dialog pops up automatically. For Basic/Windows auth a system dialog pops up. For UserSecurity an HTML form pops up.

Here's the default UserSecurity login form:

Figure 10 - A UserSecurity Authentication request

By default the login form is driven by a template in ~/Views/_login.wcs which you can customize as you see fit. The template contains a link to the main _layout.wcs page which provides the page Chrome`.

Very basic out of Box UI Features

The thing to understand about the built in authentication UI features is that they are very basic. It allows you to force a login, but there's no built-in mechanism for creating a new account, recovering a password or anything else related to account management. The form in Figure 10 basically just provides a login against a FoxPro table (or your own subclass which can do whatever it needs). I'll discuss of how to build that part of the functionality a little later on.

User Security Authentication

The user security class provides a base class called wwUserSecurity which provides simple user authentication and basic CRUD operations for adding, editing, deleting and looking up of users.

The most important method is the wwUserSecurity.Authenticate() method which is used to actually validate a username and password by looking it up in the UserSecurity.dbf table by default. The method checks for active status, account expiration and optionally manages looking up an encrypted password.

User Security works by using a Cookie and Web Connection's Session object to track a user, and it use the wwProcess class to expose the relevant user information as properties. You can use properties like Process.lIsAuthenticated to check whether the user is authenticated or Process.cAuthenticatedUser or Process.cAuthenticatedName for the user id and user name respectively. You can also access Process.oUserSecurity.oUser to get access to all of the user data that's stored in the user table if authenticated.

UserSecurity works by using a Cookie and Session State to track the user. This means User Security requires that you turn on Session usage in OnProcessInit():

FUNCTION OnProcessInit
...
InitSession("myApp")
...
ENDFUNC

Extending UserSecurity

The User Security is very simple and very generic and is meant to be used as a base class that you subclass from. At the very least I recommend you create a subclass for every application and change the table name to something specific to your application.

DEFINE CLASS TT_Users AS wwUserSecurity

calias = "tt_users"
cfilename = "tt_users"

ENDDEFINE

This now uses the users table as tt_users.dbf instead of UserSecurity.dbf. Why do this? It'll make it very clear what's stored in the user table, but it also avoids conflicts with other applications or even the Web Connection sample which also uses a UserSecurity table of its own.

The most common thing you'll do in a wwUserSecurity subclass is to override the Authenticate method. If you need to authenticate against a table in your application, or maybe some other object service like ActiveDirectory, you can do that by simply overriding the Authenticate() method. It takes a username and password and you can customize your 'business logic' here to provide custom authentication.

DEFINE CLASS TT_Users AS wwUserSecurity

FUNCTION Authenticate(lcUsername, lcPassword)

* Custom Lookup against SQL Server
llResult = SomeOtherLookupRoutine()

RETURN llResult
ENDFUNC

ENDDEFINE

You can of course also override any of the other methods in the class, so it's possible to for example change wwUserSecurity to use SQL Server or MongoDb as a data store.

Overriding the Web Connection Authentication Processing

Above I've described overriding business logic which is the core of data access. In addition to that you can also override the Web application flow. You can:

Override the Authentication Rendering

You can use the OnShowAuthenticationForm() method to provide custom rendering. This might be as simple as pointing at a different template, or completely writing code to show a the Login UI.

In your wwProcess subclass:

FUNCTION OnShowAuthenticationForm(lcUserName, lcErrorMsg)
Response.ExpandScript("~\views\MyGreatlogin.wcs")
Override the User Authorization Process

The most common thing people will want to do is to override the authentication itself. As mentioned you can do this also by overriding wwUserSecurity.Authenticate() but you can also do it in the process class.

This is the default implementation and realistically you can replace this code and return .t. or .f. with our own.

For example, on my MessageBoard I use a separate user table to login users so I completely replace the Process.OnAuthenticateUser() method:

FUNCTION OnAuthenticateUser(lcEmail, lcPassword, lcErrorMsg)

*** THIS IS THE DEFAULT IMPLEMENTATION 
*** To override behavior override this method
IF EMPTY(lcEmail)
   lcEmail = ""
ENDIF 
IF EMPTY(lcPassword)
   lcPassword = ""
ENDIF

loUserBus = CREATEOBJECT("wwt_user")

*** Default implementation is not case sensitive
IF !loUserBus.AuthenticateAndLoad(LOWER(lcEmail),lcPassword)
	*** Set lcErrorMsg to pass back via REF parm
	lcErrorMsg = loUserBus.cErrorMsg
	RETURN .F.
ENDIF	

*** Assign the user
this.cAuthenticatedUser = lcEmail && email
this.cAuthenticatedName = TRIM(loUserBus.oData.Name)

*** Add a custom sessionvar we can pick up on each request
Session.SetSessionVar("_authenticatedUserId",loUserBus.oData.CookieId)
Session.SetSessionVar("_authenticatedName",TRIM(loUserBus.oData.Name))
Session.SetSessionVar("_authenticatedAdmin",IIF(loUserBus.oData.Admin != 0,"True",""))

RETURN .T.
ENDFUNC

In this case I'm setting some custom Session vars that pull relevant information that my UI needs out of the session table. This is quicker than a user look up each time and these values are simply 'cached' once a user is logged in.

Override behavior when User is Validated

You may also want to know whether a user is authenticated or not and if he is perform some additional actions. For example, in many applications it's useful to set some additional easily accessible properties that provide more info on the user such as the user name, an email address that are not stored by default.

In that same application I set a few variables on the Process class ensure I can easily embed information into a login form.

FUNCTION OnAuthenticated()

LOCAL loUser as wwt_user, loData
loUser = CREATEOBJECT("wwt_user")
IF loUser.LoadFromEmail(this.cAuthenticatedUser)
   this.oUser = loUser
   loData = loUser.oData
   loData.LastOn = DATETIME()
   this.oUser.Save()   

   this.cAuthenticatedName = TRIM(loData.Name)
   this.cAuthenticatedUserId = TRIM(loData.CookieId)
   this.lAuthenticatedAdmin = IIF(loData.Admin # 0,.t.,.f.)
ELSE
	*** get our custom properties from Session
	this.cAuthenticatedName = Session.GetSessionVar("_authenticatedName")
	this.cAuthenticatedUserId = Session.GetSessionVar("_authenticatedUserId")
	this.lAuthenticatedAdmin = !EMPTY(Session.GetSessionVar("_authenticatedAdmin"))
ENDIF

ENDFUNC
Overriding Process.Authenticate()

The above methods all are low level functions that are called by the Authenticate() method which acts as a coordinator for various sub-behaviors. If you want to do something really custom for your authentication you can completely override the Authenticate() method altogether.

All of these functions have default implementations and if you do subclass them I recommend you copy the existing method and modify it to fit your needs. You'll be able to see how the base features work and what values they expect as input and what to send as results.

A custom User Security Manager

Cookies and Sessions

Most applications need to track something about the user after the user has logged in. At minimum you need to track the user's user ID so you can identify the user on the next request. The typical way this is done is by using HTTP Cookies which is a small bit of text that is stored in the browser's internal state storage and that is sent to the server with every request while the cookie is not expired.

Cookies should be used very sparingly and in general you should not store data in cookies, but rather identifiers that link back to content that is identifiable on the server. Cookies are often used in conjunction with server side Session State that provides for the actual 'data' stored that is related to the user cookie.

The idea is that cookies are references to data that the server needs in order to identify a user and provide commond default functionality. For example, you need to track a logged in user, so that you can display the account information for that specific user after the user has logged in. If it weren't for cookies that identifying id would have to be passed by every request explicitly on the URL query string or form buffer. So to make this easier browsers provide a Cookie interface.

Cookies are set by the server and persisted by the client and sent to the server on any subsequent server request.

You can look at the cookies you are using in any of the browser DevTools:

Notice that most of the values stored there are single value identifiers. Also note that there can be many cookies and in the figure above most of the cookies are actually 3rd party cookies (from Google Analytics and AdWords specifically)

Cookies are tied to a specific domain and have an expiration date if specified. By default Cookies persist for the duration of the browser session. Shut down the session kills the Cookie. You can explicitly set an expiration date though and the cookie then persists until that date in this browser.

You can create cookies in Web Connection with the Response.AddCookie() function:

Response.AddCookie("wwmsgbrd",loUser.Id,"/",Date() + 5,.t.,.t.)

You pass:

  • A cookie name
  • A string value
  • A path: this defaults to the root of the site
    (you should never use a different value for this!)
  • An optional expiration date (or .F.)
  • HttpOnly Cookie
  • Secure HTTPS based Cookie only

The llHttpOnly flag determines that the cookie cannot be accessed from code, meaning it's not JavaScript hackable. It's a good idea to always use this featured unless you explicitly need the cookie to be accessed in JavaScript which should be very rare.

The llHttpsOnly makes it so that cookies are not set or sent when requests are not running over HTTP which prevents potential hacking of cookies in man-in-the-middle attacks. If you run your site only using HTTPS it's a good idea to enable this flag.

Although it's tempting to never expire cookies when persisting them, it's generally not a good idea to use long expiration times. Instead keep the expiration times to a few days max and allow for refreshing the cookie when a user comes back. Web Connection Session state automatically does rolling renewals as you access a site for persisted cookies.

Session Storage - Server Side State

Related to Cookies are Sessions, which store the active user's state on the server in a table. Cookies are meant to just hold identifiers, and a common use case for cookies is a Session Id that maps the cookie to a Session id on the server.

Web Connection's Session object

Web Connection's wwSession Class uses a single cookie to link a Session table to a client side cookie. So rather than having a bunch of cookies on the client that hold information like Username, last on, and other info, that data can be stored on the server and read by the server side application. This is good because it doesn't make any of this potentially sensitive information available in the browser in a persistent fashion where it might be compromised. Instead Sessions store the key value pairs in a table on the server.

Sessions are easy to use but they do have to be enabled explicitly. To do that you can calle Process.InitSession() - typically in Process::OnProcessInit() - to enable them:

FUNCTION OnProcessInit

*** all parms are optional
*** wwDemo Cookie, 30 minute timeout, 
*** don't persist cookie across browser sessions
THIS.InitSession("wwDemo",1800,.F.)
...
RETURN

If you're using Authentication using wwUserSecurity as described earlier SessionState is automatically enabled in its default mode. I still recommend you explicitly configure Sessions as shown above for more control over how Sessions are configured.

Once sessions have been set up you can set Session variable using Session.SetSessionVar() and Session.GetSessionVar():

FUNCTION YourProcessMethod

lcSessionVar = Session.GetSessionVar("MyVar")
IF EMPTY(lcSessionVar)
   *** Not set
   Session.SetSessionVar("MyVar","Hello from a session. Created at: " + TIME())
   lcSessionVar = Session.GetSessionVar("MyVar")
ENDIF

THIS.StandardPage("Session Demo","Session value: " + lcSessionVar)
RETURN
What to use Session for

Common Application related things to store in SessionStorage are:

  • User name
  • Email address (for Gravatar links for example)
  • Last access date for features
  • Simple preferences
  • anything that needs to persist and doesn't fit a typical business object

The advantage of Session storage is that it's often quicker to retrieve Session data than to pull that same data out of one or more business objects. Sessions values are good for values that are user specific but don't fit into user specific business objects - usually related around operational values that have to do with preferences and site settings.

Although you can use Sessions to store this there's no requirement for this. You might also directly access a user table and user record that holds similar information in a more strongly typed format of a class with properties. But that's up to you.

It's important to make sure Sessions and Cookies don't persist forever. It's good to allow keeping them alive with an explicit Remember Me option, but make sure that you don't expire the cookies too far in the future. While the cookie or session are valid it's possible to just get into a site for example, and you don't want unauthorized access from accidental physical access or worse a physically compromised machine.

If you need to perist cookies/sessions keep it to a few days max and instead rely on rolling updates. Rolling updates refresh the cookie after each use and persist the cookie out for another timeout period. wwSession does this automatically, so there never should be a reason to have really long sessions timeouts. For 'persistent' sessions using a few days max is probably a good call. Session uses 5 days in advance to remember you. If you use the site that infrequently then it's probably Ok to force a new login. But if you are frequent user that accesses the site every day you probably appreciate not having to login each time.

Locking Down Web Connection

There are two areas of concern when it comes to locking down Web Connection:

  • Your Application
  • Web Connection Administration Tools

Application

A Web Connection application is your's to manage and the wwUserSecurity and wwProcess security I discussed in the last section is what's needed to lock down your application.

You can block requests to individual requests using Authenticate(), or if you want to be more granular you can look at the Process.oUserSecurity object for more specific rules to display or hide fields and other features.

How any of this works, depends entirely on the requirements of the application.

Web Connection Admin Security

For the administration end of things there are two things that need to be locked down:

  • The admin/Admin.aspx Page
  • Web Connection .NET or ISAPI Handler Administration

These two pages contain very sensitive operations that let you change the application's system behavior that can take down your site.

For this reason it's very important to make sure these pages are not accessible.

Start by removing IUSR_ rights from the admin folder in your Web Connection site. This disallows anonymous access and essentially forces a login to any physical pages in that folder.

Next make sure that the AdminAccount key in web.config or wc.iniis not empty. This account is used to protect the Handler admin page and if it is not set the page is openly accessible. By default this value is set to ANY which means any authenticated user can access the page, but it's better to apply a specific account or comma delimited accounts that can access the page.

Script Attacks

One common attack vector for hackers is to try to hack scripts and dynamic code generation code by 'injecting' malicious code into user input. Any site that takes user input has to be very aware of how that input might be displayed later.

Always be wary of data that is entered and then displayed back to users. There are a number of different attacks but the most popular even to this day are:

  • Cross Site Scripting (XSS) Attacks
  • Sql Injection Attacks

Cross Site Script (XSS) Attacks

Cross site scripting gets its name from the idea that almost any code that manages to get injected into a page, ends up sending data to another site, thereby stealing potentially sensitive data.

What is XSS?

XSS works through user input and injecting script code into the input in hopes that the site operator doesn't properly sanitize their input. The problem with input is that if you simply echo back raw HTML tags as is without Sanitizing them these HTML tags will render as - well HTML. The problem is that HTML also has support for script execution in a number of ways and if a black hat can plant a bit of script code into user input that is then displayed to all users who get to see his user input - somebody just won at XSS Bingo!

So say, you are running a message board like I do and you take raw user input. Lets say I allow users to type plain text or markdown. Now our Fred Hacker comes along and types this into my simple <textara>

Hey, 

Cool Site.

<script>alert('gotcha!')</script> <script src="https://gotcha.com/evilMindedWizard.js"></script>

Like what you've done here. Come check out 
<a href="javascript: alert('gotcha')>my site</a><div style="padding: 20px;opacity: 0" onmouseover="alert('mouse gotcha');"></div>

If I capture that content with Request.Form() then write it to a database, then later display it to my users as is like this:

<%= poMessage.Message %>

I'll be in for a rude awakening. Now everytime the page with this message loads for other users browsing the this site they see alert boxes popping up. And of course that's pretty benign - more likely a large block of code would be used to high jack browser cookies and potentially other sensitive content on the page and send it to another site.

I'll end up with script code executing those first two scripts when the page loads, the javascript: code when I click the link, the mouse hover when I hover over the invisible <div> area. Not cool!

HTML Encoding

Luckily it's fairly easy to mitigate script embedding by ensuring that content is HTML Encoded. So rather than writing the message out in raw form I can write it out as:

<%= EncodeHtml(poMessage.Message) %>

or

<%: poMessage.Message %>

Both encode the message text which effectively replaces the < and > tag into HTML entities that aren't executed as script. Note that the <%: %> syntax is relatively new and it basically does the exact same thing as the command above.

HTML Sanitation

Another option is to clean up user input by sanitizing it and removing script capable code rather than HTML encoding. This might be necessary if you're capturing user input as Markdown for example, and then echo the result back which might include embedded HTML - including script tags. Html Encoding this content wouldn't work because it would encode the potentially desired embedded HTML text.

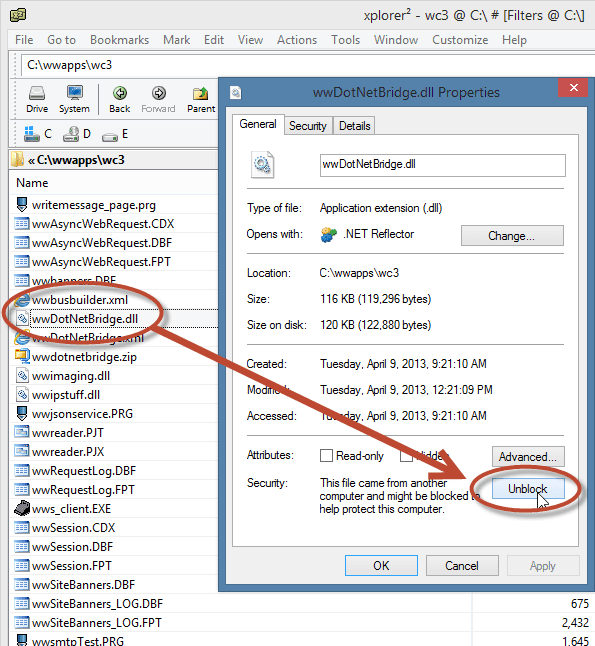
So rather than HtmlEncoding I can call the new SanitizeHtml() function (in wwutils.prg which calls into wwDotnetBridge) which essentially strips script tags, iframes, forms and a few other elements, javascript: directives and onXXX events from elements.

This:

<%: SanitizeHtml(poMessage.Message) %>

allows for HTML in the content, but strips anything that can potentially run as script.

SQL Injection

SQL Injection has been around for as long as there has been a SQL language and while SQL Injection has received a lot of bad publicity over the years there's still a lot of Web traffic that tries to exploit SQL injection attacks via URLs or user input.

SQL Injection works on the assumption that user input is directly passed from the query string or form variable input into a statement that manually tries to build a SQL string by building SQL queries or commands and embedding static string values as query parameters.

Never, ever build literal strings for SQL code:

lcSql = [select * from Messages where id = '] + lcId + [']

The problem with the above code is that somebody could pass:

"123';drop table Messages;set x = '1111"

The command would end up as:

select * from Messages where id = '123';drop table Messages; set x = '111'

If you pass that string to a SQL server it's not going to be a happy day. Now an attacker would have to know something about the table structure, the type of database used, but there are many hacks, but still... it's easy to do damage with this kind of code.

Don't ever write static string values into string based SQL Statements. Never, Ever!

The simple solution is use named parameters or variables:

lcSql = [select * from Messages where id = ?lcId]
lcSql2 = [select * from Messages where id = lcId]

Note that this is mostly a problem if you are executing SQL backend commands. FoxPro data tends to be accessed directly with variables so this is less of an issue with Fox data, but if you're using a SQL Server or MySql or any other SQL backend this is important.

Checking for Hacks

If you suspect you've been hacked, how do you know?

The best way to check is by going into the logs, and there are two key logs you can go to:

  • IIS Request Logs
    The IIS log logs every single request into the Web Server and as you might expect this log can be ginormous. Every page, image, css, script etc. is logged and these log files can be really unwieldy to work with.

To make things a little bit easier you might look at a log parsing tool like Log Parser Lizard GUI which allows you to query logs using a SQL like language. It's very powerful and beats the hell out of manually digging through logs. This tool as a front end to Microsoft LogParser and it works not just with IIS logs but various other Windows log files like the Event log for example.

Attacks usually start with probing your server to find vulnerabilities so looking through the logs for errors is usually a good start to see patterns that hackers are using to attack your site. It's useful to set up monitoring to get notified on errors. This can be annoying, but it it can be a life saver if there ever is a problem and you see it in the making rather than in the read view mirror.

Responding to Getting Hacked

So it's happened. You got hacked. Somebody got in and you lost some data. Now what?

If you know you got compromised the first step is to try and find out if it's still happening and to make sure that the problem isn't still ongoing. There's nothing worse than compromising information and continuing to leak it. This may not be easy to figure out but if you are not sure it's best to shut down your site until you can resolve either what's happened.

It's better to be down, than continuing to leak

If your servers were compromised and system access was obtained from the outside, the only sensible solution at that point is to try to spin up a new machine and move your data over to that machine. Once system level access is lost there's really no good way to ensure that there isn't some bit of malware still on the system that might be telegraphing out data.

If your data was corrupted that might be worse because you can't just pack up and start over. Your only option in that case is to go back to a previous backup.

That brings up an important point:

Back up your Data!

Have a backup strategy that lets you get your data back to a sensible point in time. Make sure you have rolling backups that provide you multiple time staggered sets of backups in case recent backups have also been corrupted.

Disclose

If your data got hacked and you leaked sensitive data, you are required to report the incident to the authorities and to the affected parties. Not only is it required by law but it's also common decency so that those affected can take potential action to prevent further damage from the compromised data.

It may not always be possible to ascertain exactly what data was leaked, so disclosure has to be made to every potentially affected customer. It's certainly a bad step to have to take, and sure to piss your customers off, but it's a 1000 times worse if you hide the knowledge and it comes out later through an investigation or a whistle blower. It's way better to get out front of it right when it happens than trying to draw out the pain.

Think about how often have we have heard about data breaches in the news and think about which companies make the best impression when this happens - it's those that come out right away admit their failure and describe what they are doing to mitigate. Compare that to the dead beats that hide it, are found out and eventually are slapped with a heavy fine. Which company do you think is more likely to bounce back from a data breach?

Closing

Let's hope a breach or system compromise never happens, but it's always a possibility. I write this bit here at the very end of this long paper in hopes that it will scare you into action of thinking security, not as an afterthought but as an integral part of the application building process. Security is something that's much easier to build in from the beginning than trying to bolt on at the end.

If you have mission critical applications, especially those that hold sensitive or valuable data, make sure you take security very seriously. Security is a very complex and large field and if you as a developer feel overwhelmed you're not alone. If you don't know or feel you don't understand all the issues, it's a good idea to bring in outside help for security consulting or even hire an internal person who's responsibility it is to audit the hardware, network and application to ensure (as much as is possible) that security protocols are followed.

Let's make sure that hackers don't have an easy time getting into your site...

Summary

Security is a complex topic and there's much more to it than what I describe here. What I've focused on in this document are the most common and also Web Connection centric issues that you need to worry about, that are geared to the typical developer who needs to manage his or her own application without the support of a dedicated IT department.

If you are dealing with highly sensitive data, you will no doubt be required to have your software audited and likely will have to rely on security experts to help with that process. Even if not it's often a good idea to bring a security specialist to work with you through threat analysis to find and address any security issues. No amount of generic tooling or setting of configuration options is going to be an automatic guarantee that your application is secure, but it requires some fore-thought and testing to ensure that both the operating environment are secure.

I hope this article has at minimum given you a good starting point on what to look for and make your apps more secure...

Resources

this post created and published with Markdown Monster

Marking up the World with Markdown and FoxPro

$
0
0

prepared for:Southwest Fox 2018
October 1st, 2018

Markdown has easily been one of the most influential technologies that have affected me in the last few years. Specifically it has changed how I work with documentation and a number of documents both for writing and also for text editing and content storage inside of applications.

Markdown is a plain text representation of HTML typically. Markdown works using a relatively small set of easy to type markup mnemonics to represent many common document centric HTML elements like bold, italic, underlined text, ordered and unordered lists, links and images, code snippets, tables and more. This small set of markup directives is easy to learn and quick to type in any editor without special tools or applications.

In the past I've been firmly planted in the world of rich text editors like Word, or using a WYSIWYG editor on the Web, or for Blog Editing using something like Live Writer which used a WYSIWYG editor for post editing. When I first discovered Markdown a number of years ago, I very quickly realized that rich editors, while they look nice as I type, are mostly a distraction and often end up drastically slowing down my text typing. When I write the most important thing to me is getting my content onto the screen/page as quickly as possible and having a minimal way to do this is more important than seeing the layout transformed as I type. Typing text is oddly freeing, and with most Markdown editors is also much quicker than using a rich editor. I found that Markdown helped me in a number of ways to improve my writing productivity.

Pretty quickly I found myself wishing most or all of my document interaction could be via Markdown. Even today I often find myself typing Markdown into email messages, comments on message boards and even into Word documents where it obviously doesn't work.

For me Markdown was highly addictive. I wanted Markdown in all the places!

Today I write most of my documentation for products and components using Markdown. I write my blog posts using Markdown. The West Wind Message Board uses Markdown for messages that users can post. I enter product information in my online store using - you guessed it - Markdown. This document you're reading now, was written in Markdown as well.

I work on three different documentation tools and they all use Markdown, one with data stored in FoxPro tables, the others with Markdown documents on disk. Heck I even wrote a popular Markdown Editor called Markdown Monster to provide an optimized editing experience, and it turns out I'm not alone in using Markdown with some cool support features that I can build myself because Markdown is a non-proprietary format that can be easily enhanced because it's easy to simple inject text into a text document.

What is Markdown?

I gave a brief paragraph summary of Markdown above. Let me back this up with a more thourough discussion of what Markdown is. Let's start with a quick look at what Markdown looks like here inside of a Markdown editor that provides syntax highlighting for Markdown:

There are of course many more features to Markdown, but this gives you an idea what Markdown content looks like. You can see that the Markdown contains a number of simple formatting directives, yet the document you are typing is basically text and relative clean. Even so you are looking at the raw Markdown which includes all of the formatting information.

And this is one of the big benefits of Markdown: You're working with text using the raw text markup format while at the same time working in a relatively clean document that's easy to type, edit and read. In a nutshell: There's no magic hidden from you with Markdown!

Let's drill into what Markdown is and some of the high-level benefits it offers:

HTML Output Based

Markdown is a plain text format that typically is rendered into HTML. HTML is the most common output target for Markdown. In fact, Markdown is a superset of HTML and you can put raw HTML inside of a Markdown document.

However there are also Markdown parsers that can directly create PDF documents, ePub books, revealJS slides and even WPF Flow Layout documents. How Markdown is parsed and used is really up to the Parser that is used to turn Markdown into something that is displayed to the user. Just know that the initial assumption is that they output is HTML. For the purpose of this document we only discuss Markdown as an HTML output renderer.

Although Markdown is effectively a superset of HTML - it supports raw HTML as part of a document - Markdown is not a replacement for HTML content editing in general. Markdown does great with large blocks of text based such as documentation, reference material, or on Web sites for informational content like About pages, Privacy Policies and the like that are mostly text. Markdown's markup can represent many common writing abstractions like bold text, lists, links, images etc. but the markup itself outside of raw HTML doesn't have layout support. IOW, you can't easily add custom styling, additional HTML <div> elements and so on. Markdown is all about text and few most-used features appropriate for text editing.

Plain Text

One of the greatest features of Markdown is that it's simply plain text. This means you don't need a special editor to edit it. Notepad or even an Editbox in FoxPro or a <textarea> in a Web application is all you need to edit Markdown. It works anywhere!

If you need to edit content and want to create HTML output, Markdown is an easy way to create that HTML output by using a Markdown representation of it as plain text. Markdown is text centric so it's meant primarily for text based documents.

Markdown offers a great way to edit content that needs to display as HTML. But rather than editing HTML tag soup directly, Markdown lets you write mostly plain text with only a few easy to remember markup text "symbols" that signify things like bold and italic text, links, images headers and lists and so on. The beauty of Markdown is that it's very readable and editable as plain text, and yet can still render nice looking HTML content. For editing scenarios it's easy to add a previewer so you can see what you're typing without it getting in the way of your text content.

Markdown makes it easy to represent text centric HTML output as easily typeable, plain text.

Simplicity

Markdown is very easy to get started with, and after learning less than a handful of common Markdown markup commands you can be highly productive. Most of the mark up directives feel natural because a number of them have already been in use in old school typesetting solutions for Unix/Dos etc. For the most part content creation is typing plain text with a handful of common markup commands - bold, italic, lists, images, links are the most common - mixed in.

Raw Document Editing

With Markdown you're always editing the raw document. The big benefit is you always see what the markup looks like because you are editing the raw document not some rendered version of it. This means if you use a dedicated Markdown Editor that helps embedding tags for you you can see the raw tags that are embedded as is. This makes it easy to learn Markdown because even if you use editor tooling you immediately see what that tooling does. Once you get familiar, many markdown 'directives' are quicker to simply type inline rather than relying on hotkeys or toolbar selections.

Productivity

Markdown brings big productivity gains due to the simplicity involved in simply typing plain text and not having to worry about formatting while writing. To me (and many others) this can't be overstated. I write a lot of large documents and this this is a s a minimalist approach. But to me this greatly frees my mind from unneeded clutter to focus on the content I'm trying to create.

Edit with any Editor or Textbox

Because Markdown is text, you don't need to use a special tool to edit it - any text editor, even NotePad will do, or if you're using it in an application a simple textbox does the trick in desktop apps or Web apps. It's also easy to enhance this simple interface with simple convenience features and because it's just plain text it's also very easy to build custom tooling that can embed complex text features like special markup, equations or publishing directives directly into the document. This is why there is a lot of Markdown related tooling available.

Easy to Compare and Share

Because Markdown is text it can be easily compared using Source Control tools like Git. Markdown text is mostly content, unlike HTML so source code comparisons aren't burdened by things HTML tags or worse binary files like Word.

Fast Editing

Editing Markdown text tends to be very fast, because you are essentially editing plain text. Editors can be bare bones and don't need to worry about laying out text as you type, slowing down your typing speed. As a result Markdown editors tend to feel very fast and efficient without keyboard lag. Most WYSIWYG solutions are dreadfully slow for typing (the big exception being Word because it uses non-standard keyboard input trapping).

Developer Friendly

If you're writing developer documentation one important aspect is adding syntax colored code snippets. If you've used Word or a tool that uses a WYSIWYG HTML editor you know what a pain it can be for getting properly color coded code into a document.

Markdown has native support for code blocks as part of Markdown syntax which allows you to simply paste code into the document as text and let the Markdown rendering handle how to display the syntax. The generated output for code snippets uses a commonly accepted tag format:

<pre><code class="language-html">
lcId = SYS(2015)</code></pre>

There are a number of JavaScript libraries that understand this syntax formatting and easily can turn this HTML markup in syntax highlighted code. I use highlightJS - more on that later.

Markdown Transformation

Markdown is a markup format which means, that it is meant to take Markdown text and turn it into something else. Most commonly that something else is HTML, which can then be used for other things like PD, Word or EPub document creation using additional and widely available tools.

Markdown has many uses and it can be applied to a number of different problem domains:

  • General document editing
  • Documentation
  • Rich text input and storage in applications
  • Specialized tools like note editing or todo lists etc.

If you're working in software and you're doing anything with open source, you've likely run into Markdown files and the ubiquitous readme.md files that are used for base documentation of products. Beyond that most big companies are now using Markdown as their primary documentation writing format.

What problem does Markdown Solve?

At this point you may be asking yourself: I've been writing for years in Word - what's wrong with that? or I use an WYSIWYG HTML Editor in my Web Application for rich text input, so what does Markdown provide that these solutions don't?

There are several main scenarios that Markdown (and also other markup languages) addresses that make it very useful.

Text Based

First Markdown is text based which means you don't need special tooling to edit a markdown file. You don't need Word or some HTML based editor to edit markdown. You can use NotePad or a plain HTML text box to write and edit Markdown text and because the Markdown features are very simple text 'markup directives' even using a plain textbox lets you get most of the job done.

You can also use specialized editors - most code editors like Visual Studio Code, Notepad++ or Sublime text all have built in support for Markdown syntax coloring and some basic expansion. Or you can use a dedicated Markdown Editor like my own Markdown Monster.

Using Markdown in FoxPro

In order to use Markdown in any environment you need to use a Markdown parser that can convert Markdown into HTML. Once it's in HTML you need to use the HTML in manner that is useful. For Web applications that usually is as easy as embedding the HTML into a document, but there are number of different variations.

In desktop applications you often need a WebBrowser control or external preview to see the Markdown rendered in a useful way.

Markdown Parsing for FoxPro

The best option for Markdown Parsing for FoxPro is to use one of the many .NET based Markdown parsers that are available. I'm a big fan of the MarkDig Markdown Parser because it includes a ton of support features like Github flavored Markdown that is generally used, various table formats, link expansion, auto-id generation and fenced code blocks out of the box. Markdig is also extensible so it's possible to create custom extensions that can be plugged into Markdigs Markdown processing pipeline.

To access this .NET component from FoxPro I'm going to use wwDotnetBridge. There are a couple of different ways to deal with Markdown parsing, but lets start with the simplest which is just to use the built-in 'just do it' function that Markdig itself provides:

do wwDotNetBridge
LOCAL loBridge as wwDotNetBridge
loBridge = GetwwDotnetBridge()
loBridge.LoadAssembly("Markdig.dll")

TEXT TO lcMarkdown NOSHOW
# Markdown Sample 2
This is some sample Markdown text. This text is **bold** and *italic*.

* List Item 1
* List Item 2
* List Item 3

Great it works!

> ###   Examples are great> This is a block quote with a header

Here's a quick code block

```foxpro
lnCount = 10
FOR lnX = 1 TO lnCount
   ? "Item " + TRANSFORM(lnX)
ENDFOR
ENDTEXT

lcHtml = loBridge.InvokeStaticMethod("Markdig.Markdown","ToHtml",lcMarkdown,null)
? lcHtml
RETURN

Markdown Output

This is the raw code to access the Markdig dll and load it, then call the MarkDig.Markdown.ToHtml() function to convert the Markdown into HTML. It works and produces the following HTML output:

<h1>RAW MARKDOWN WITH Markdig</h1><p>This is some sample Markdown text. This text is <strong>bold</strong> and <em>italic</em>.</p><ul><li>List Item 1</li><li>List Item 2</li><li>List Item 3</li></ul><p>Great it works!</p><blockquote><h3>Examples are great</h3><p>This is a block quote with a header</p></blockquote>

which looks like this:

Keep in mind that Markdown rendering produces an HTML Fragement which doesn't look very nice because it's just HTML without any formatting applied. There's no formatting for the base HTML, and the code snippet is just raw text. To make this look a bit nicer we need to apply some formatting.

Here's that same HTML fragment rendered into a full HTML page with Bootstrap, highlightJs and a little bit of custom formatting applied:

This looks a lot nicer. The idea of this is to use a small template and merge the rendered HTML into it. Here's some code that uses a code based template (although I would probably store the template as a file and load it for customization purposes):

Here's the template:

<!DOCTYPE html><html><head><title>String To Code Converter</title><link href="https://unpkg.com/bootstrap@4.1.3/dist/css/bootstrap.min.css" rel="stylesheet" /><link rel="stylesheet" href="https://use.fontawesome.com/releases/v5.3.1/css/all.css"><style>
        body, html {
            font-size: 16px;
        }
        body {
            margin: 10px 40px;
        }
        blockquote {
		    background: #f2f7fb;
		    font-size: 1.02em;
		    padding: 10px 20px;
		    margin: 1.2em;
		    border-left: 9px #569ad4 solid;
		    border-radius: 4px 0 0 4px;
		}
        @media(max-width: 600px) 
        {
            body, html {
                font-size: 15px !important;
            }
            body {
                margin: 10px 10px !important;                
            }
        }</style></head><body><div style="margin: 20px 5%"><%= lcParsedHtml %></div><script src="https://weblog.west-wind.com/scripts/highlightjs/highlight.pack.js" type="text/javascript"></script><link href="https://weblog.west-wind.com/scripts/highlightjs/styles/vs2015.css" rel="stylesheet" type="text/css" /><script>
		function highlightCode() {
		    var pres = document.querySelectorAll("pre>code");
		    for (var i = 0; i < pres.length; i++) {
    		    hljs.highlightBlock(pres[i]);
	    	}
		}
		highlightCode();</script>	</body></html>

and here is the code that parses the Markdown and merges into the template. Notice the <%= lcParsedHtml %> tag that is responsible for merging the parsed HTML into the template

DO MarkdownParser

TEXT TO lcMarkdown NOSHOW
# Markdown Sample 2
This is some sample Markdown text. This text is **bold** and *italic*.

* List Item 1
* List Item 2
* List Item 3

Great it works!

> ###   Examples are great> This is a block quote with a header

ENDTEXT

lcParsedHtml = Markdown(lcMarkdown,2)
? lcParsedHtml

lcTemplate = FILETOSTR("markdownpagetemplate.html")

*** Ugh: TEXTMERGE mangles the line breaks for the code snippet so manually merge
lchtml = STRTRAN(lcTemplate,"<%= lcParsedHtml %>",lcParsedHtml)
showHtml(lcHtml)

Beware of TEXTMERGE

FoxPro's TextMerge command can have some odd side effects - when using << lcParsedHtml >> in the example above, TEXTMERGE mangled the line breaks running text together instead of properly breaking lines based on the Markdown \n linefeed only output. When merging output from an Markdown parser into an HTML document, explicitly replace the content rather than relying on TEXTMERGE.

Using the underlying Parsing

The Markdown() function is very easy and it uses a cached instance of the parser so the Markdown object doesn't have to be configured for each use. If you want a little more control you can the underlying MarkdownParser class directly. This is a little more verbose but gives a little more control.

TEXT TO lcMarkdown NOSHOW
This is some sample Markdown text. This text is **bold** and *italic*.

* List Item 1
* List Item 2
* List Item 3


<script>alert('Gotcha!')</script>
Great it works!> ####  Examples are great> This is a block quote with a header
ENDTEXT

loParser = CREATEOBJECT("MarkdownParser")
loParser.lSanitizeHtml = .T.
lcParsedHtml = loParser.Parse(lcMarkdown)

? lcParsedHtml
ShowHtml(lcParsedHtml)

There's also a MarkdownParserExtended class that adds a few additional features, including support for FontAwesome Icons via syntax and special escaping of <%= %> which are removed from the document before the Markdown Parser runs so it doesn't interfere with the parser.

Sanitizing HTML

Because Markdown is a superset of HTML, you should treat all Markdown captured from users as dangerous.

Let me repeat that:

User Captured Markdown has to be Sanitized

Any user input you capture from users as Markdown that will be displayed on a Web site later should be treated just like raw HTML input - it should be considered dangerous and susceptible to Cross Site Scripting (XSS) Attacks.

You might have noticed the code above that does:

loParser.lSanitizeHtml = .T.

which enables HTML sanitation of the Markdown before it is returned. This flag force <script> tags, javascript: directives and any onXXXX= events to be removed from the output HTML. This is the default setting and it's always what's used when you call the Markdown() function.

Sanitation should usually be on which is why it's the default, but there are a few scenarios where it makes sense to have this flag off. If you are in full control of the content you might have good reason to embed scripts. For example, I use Markdown for Blog posts and occasional I link to code my own snippets on gist.github.com, which requires <script> tags to embed the scripts.

If the content you create is controlled, then this not a problem. In this case I'm the only consumer. If you use Markdown for product descriptions in your product catalog, and the data is all internally created then it's probably safe to allow scripts. But even so - if you don't have scripts, don't allow them. Better safe than sorry - always!

Static Markdown in Web Connection

In addition to the simple Markdown Parsing, if you're using Web Connection there are a couple of useful features built into the framework that let you work with Markdown content.

  • Static Markdown Islands in Scripts and Templates
  • Static Markdown Pages

If you're building Web sites you probably you probably have a bit of static content. Even if your site is mostly dynamic, almost every site has a number of static pages, or a bunch content that is just text like disclaimers or maybe some page level help content. Markdown is usually much easier to type than HTML markup for this lengthy text.

Markdown Islands

Web Connection Scripts and Templates support a special <markdown> tag. Basically you can embed a small block of Markdown into the middle of a larger Script or Template:

<markdown>> ##### Please format your code> If your post contains any code snippets, you can use the `<\>` button> to select your code and apply a code language syntax. It makes it > **much easier** for everyone to read your code.</markdown>

This can be useful if you have an extended block of text inside of a greater page. For example you may have a download page that shows a rich HTML layout for download options, but the bottom half of the page, has disclaimers, licensing and other stuff that's mostly just text (perhaps with very little HTML mixed in which you can do inside of Markdown). Here's that example:

Static Markdown Pages

Sometimes you simply want to add a static page that is all or mostly text. Think about your About page, privacy policy, licensing pages etc. There are other more dynamic use cases as well. For example, you might want to create blog entries as Markdown Pages and simply store them on the server by dropping the page into a folder along with its related assets.

As of Web Connection 6.22 you can now drop a .md file into a folder and Web Connection will serve that file as an HTML document.

There's a new .md script map that Web Connection adds by default. For existing projects you can add the .md scriptmap to your existing scriptmaps for your site and then update the wwScripting class from your Web Connection installation.

There's also a new ~/Views/MarkdownTemplate.wcs, which is a script page into which the Markdown is rendered. Web Connection then generically maps any incoming .md extension files to this template and renders the Markdown into it.

The template can be extremely simple:

<%
    pcPageTitle = IIF(type("pcTitle") = "C", pcTitle, pcFilename)
%><% Layout="~/views/_layoutpage.wcs" %><div class="container"><%= pcMarkdown %></div>

This page simply references the master Layout page and then creates a bootstrap container into which the markdown is rendered. There are two variables that are passed into the template pcMarkdown and pcTitle. The title is extracted from the document either by looking for a Yaml title header:

---
title: Markdown in FoxPro
postId: 432
---
# Markdown in FoxPro
Markdown is... and blah blah blah 

or for the first # Header element towards the top of the document (first 1500 chars).

Once the scriptmap and template are in place you can now simply place a .md document into the site's folder structure and it'll be served as HTML when referenced via the browser.

For the following example, I took an existing blog post I'd written in Markdown Monster as a Markdown file. I set up a folder structure for blog posts that include parts for paths and simply dropped the existing Markdown file and its associated images inot that folder:

And voila - I can now access this file at the specified URL:

https://localhost/wconnect/Markdown/posts/2018/09/25/FixwwDotnetBridgeBlocking.md

The folder structure provides the URL sections that fixes the post uniquely in time which is common for Blog posts. This is an easy way to add a blog to a Web site without much effort at all. Simply write Markdown as a file and copy it to the server. For bonus points integrate this with Git to allow posts to be edited and published using Git.

Using Markdown in Applications

Let's look at a few examples how I use Markdown in my own applications.

West Wind Support Message Board

In a Web Application it's easy to use Markdown and just take the output and stuff it into part of your rendered HTML page.

For example, on my message board I let users enter Markdown for messages that are then posted and displayed on the site:

The message board is available as a Web Connection sample site on GitHub:

The site displays each thread as a set of messages, with each message displaying it's own individual Markdown content. This is a Web Connection application that uses a templates.

The Process class code just retrieves all the messages into a cursor from a business object and then uses Script Page to render the output:

FUNCTION Thread(lcThreadId)
LOCAL loMsgBus

pcMsgId = Request.QueryString("msgId")

loMsgBus = CREATEOBJECT("wwt_Message")
lnResult = loMsgBus.GetThreadMessages(lcThreadId)

IF lnResult < 1
   Response.Redirect("~/threads.wwt")
   RETURN
ENDIF

PRIVATE poMarkdown
poMarkdown = THIS.GetMarkdownParser()

Response.GzipCompression = .T.

*** Don't auto-encode - we manually encode everything
*** so that emojii's and other extendeds work in the
*** markdown text
Response.Encoding = ""
Response.ContentType = "text/html; charset=utf-8"

Response.ExpandScript("~/thread.wwt")

This retrieves a list of messages that belong to the thread and the template loops through them and displays Markdown for each of the messages (simplified):

<%
    pcPageTitle = STRCONV(subject,9) + " - West Wind Message Board"
    pcThreadId = Threadid
%><% Layout="~/views/_layoutpage.wcs" %><div class="main-content">
    ...  page header omitted<div class="thread-title page-header-text" style="margin-bottom: 0;"><%: TRIM(Subject) %></div><!-- Message Loop --><%
    lnI = 0
    SCAN
       lnI = lnI + 1
    %><div id="ThreadMessageList">              <article class="message-list-item" data-id="<%= msgId %>" data-sort="<%= lnI %>">
            ... header omitted<!-- Render the Message Markdown here --><div class="message-list-body"><%=  poMarkdown.Parse(Message,.T.) ) %></div></article></div><% ENDSCAN %></div> 

Note that I'm not using the Markdown function directly, as I'm doing some custom setup and I also want to explicitly force the output to UTF-8 as part of the parsing process (the .T. parameter). The reason I'm using a custom function is that I need to explicitly strip out <% %> scripts before rendering so that they don't get executed as part of user input. I also want all links to automatically be opened in a new window called wwt by having a target added to each and every link tag.

In short I need a customized parser and the generic Markdown() function doesn't quite provide what I need, so I implement my own version that is customize to my needs.

PROTECTED FUNCTION GetMarkdownParser()
LOCAL loMarkdown

PUBLIC __wwThreadsMarkdownParser
IF VARTYPE(__wwThreadsMarkdownParser) = "O"
   loMarkdown = __wwThreadsMarkdownParser
ELSE
	loMarkdown =  CreateObject("MarkdownParserExtended")
	loMarkdown.lFixCodeBlocks = .T.
	loMarkdown.cLinkTarget = "wwt"
	__wwThreadsMarkdownParser = loMarkdown
ENDIF

RETURN loMarkdown
ENDFUNC

This is very similar to what Markdown() does internally, but customized to my own needs. It still caches the parser instance in a global variable so it doesn't have to be recreated for each and every serving which improves performance.

Entering Markdown

The message board also captures Markdown text when users write a new message:

The data entry here is a simple <textarea></textarea>. As mentioned Markdown is just text, so a <textarea> works just fine.

<textarea id="Message" name="Message"
        style="min-height: 350px;padding: 5px; 
        font-family: Consolas, Menlo, monospace; border: none;
        background: #333; width: 100% ; color: #fafafa"><%= Request.FormOrValue('Message',poMsg.Message) %></textarea>

I simply changed the color scheme to use black on white just to make it more 'terminal like' (I happen to like dark themes if you haven't noticed ??). There is also logic to insert special Markdown into the textbox via selections using JavaScript and key shortcuts, but that's just a bonus.

The text is previewed as you type on the client side using a JavaScript component (marked Js) that simply redisplays as the user types a message. Oddly enough - people still seem to screw up posting code constantly, even though the buttons are pretty prominent as the is the message below. Go figure.

Using Markdown for Inventory Item information

A common use case for Markdown is to use it even in desktop applications that need to handle rich information. For example, in my Web Store I use Markdown for the item descriptions that are displayed in the store. I also have an offline application that I primarily use to manage my orders and inventory. The inventory form allows me to enter markdown text as plain text. There's a simple preview button that lets me simply see the content in the default browser.

If it's all good I can upload the item to my Web Server via a Web service and look at the item online where the Markdown is rendered using Markdig as shown before (but using .NET in this case).

The desktop application doesn't use Markdown in other places so here I just do the simplest thing possible in .NET code:

private void btnPreview_Click(object sender, EventArgs e)
{
    var builder = new MarkdownPipelineBuilder()
        .UseEmphasisExtras()
        .UsePipeTables()
        .UseGridTables()
        .UseAutoLinks() // URLs are parsed into anchors
        .UseAutoIdentifiers(AutoIdentifierOptions.GitHub) // Headers get id="name" 
        .UseAbbreviations()
        .UseYamlFrontMatter()
        .UseEmojiAndSmiley(true)
        .UseMediaLinks()
        .UseListExtras()
        .UseFigures()
        .UseCustomContainers()
        .UseGenericAttributes();

    var pipeline = builder.Build();
    
    var parsedHtml = Markdown.ToHtml(Item.Entity.Ldescript,pipeline);

    var html = PreviewTemplate.Replace("${ParsedHtml}", parsedHtml);
    ShellUtils.ShowHtml(html);
}

ShellUtils.ShowHtml(html); is part of Westwind.Utilites and simply takes an HTML fragment or a full HTML document and dumps it to a file, then shows that file in the default browser which is the browser window shown in the previous figure.

Using HTML for Documentation

As mentioned Markdown is great for text entry and documentation creation is the ultimate writing excercise. There are a couple of approaches that can be taken with this. I've two separate tools related to documentation:

  • West Wind Html Help Builder
    An older FoxPro application that stores documentation content in FoxPro tables. The application was updated a while back to use Markdown for all memo style text entry.

  • KavaDocs
    This is a newer tool still under development that uses Markdown files on disk with embedded meta data to hold documentation and related data. The system is based on Git to provide shared editing functionality and collaboration. There are also many integrations with other technologies.

Help Builder and Traditional Help Systems

Help Builder uses FoxPro tables and is a self-contained solution where everything lives in a single tool. Help Builder was designed originally for building CHM files for use - with FoxPro and other tools, and the UI reflects that. In recent years however the focus has been on building Web based output along with a richer Web UI than was previously used.

Help Builder internally uses script templates that are used to handle the layout for each topic type. The following is the main Topic template into a which the content of the oTopic object and its properties that make up the help content is rendered:

<% Layout="~/templates/_Layout.wcs" %><h1 class="content-title"><img src="bmp/<%= TRIM(LOWER(oHelp.oTopic.Type))%>.png"><%= iif(oHelp.oTopic.Static,[<img src="bmp/static.png" />],[]) %><%= EncodeHtml(TRIM(oHelp.oTopic.Topic)) %></h1><div class="content-body" id="body"><%= oHelp.FormatHTML(oHelp.oTopic.Body) %></div><% IF !EMPTY(oHelp.oTopic.Remarks) %><h3 class="outdent" id="remarks">Remarks</h3><blockquote>        <%= oHelp.FormatHTML(oHelp.oTopic.Remarks) %></blockquote><% ENDIF %>  <% IF !EMPTY(oHelp.oTopic.Example) %><h3 class="outdent" id="example">Example</h3><%= oHelp.FormatExample(oHelp.oTopic.Example)%><% ENDIF %>   <% if !EMPTY(oHelp.oTopic.SeeAlso) %><h3 class="outdent" id="seealso">See also</h3><%= lcSeeAlsoTopics %><%  endif %>

These templates are customizable by the user.

The key items to not here is the oHelp.FormatHtml() function which is responsible for turning the content of a specific multi-line field into HTML. There are several formats with Markdown being the newest addition.

***********************************************************************
* wwHelp :: FormatHtml
*********************************
LPARAMETER lcHTML, llUnformat, llDontParseTopicLinks, lnViewMode
LOCAL x, lnRawHTML, lcBlock, llRichEditor, lcText, lcLink, lnRawHtml

IF EMPTY(lnViewMode)
  IF VARTYPE(this.oTopic) == "O"
     lnViewMode = this.oTopic.ViewMode
  ELSE
     lnViewMode = 0
  ENDIF     
ENDIF

*** MarkDown Mode
IF lnViewMode = 2 
   IF TYPE("poMarkdownParser") # "O"
      poMarkdownParser = CREATEOBJECT("wwHelpMarkDownParser")
      poMarkdownParser.CreateParser(.t.,.t.)
   ENDIF
   RETURN poMarkdownParser.Parse(lcHtml, llDontParseTopicLinks)
ENDIF  

IF lnViewMode = 1
   RETURN lcHtml
ENDIF

IF lnViewMode = 0 OR lnViewMode = 1
	loParser = CREATEOBJECT("HelpBuilderBodyParser")	
	RETURN loParser.Parse(lcHtml, llDontParseTopicLinks)
ENDIF

RETURN "Invalid ViewMode"
* EOF FixNoFormat

As I showed earlier in the Message Board sample, here again I use the Markdig parser, but in this case there's some additional logic built ontop of the base Markdown parser that deals with Help Builder specific directives and formatting options. wwHelpMarkdownParser extends MarkdownParserExtended to do this.

As before the parser is cached so if the instance exists it doesn't have to be created again for performance. Each topic can have up to 5 Markdown sections so reuse is an important performance point. The template renders HTML output into a local file, which is then displayed in the preview on the left in a Web Browser control.

Output generation varies depending on whether you're previewing which generates a local file that is previewed from disk. Online there's a full HTML UI that surrounds each topic and provides for topic navigation:

The online version is completely static, so the Markdown to HTML generation actually happens during build time of the project. Once generated you end up with a static HTML Web site that can just be uploaded to a Web server.

KavaDocs

KavaDocs is another documentation project I'm working on with Markus Egger. It also uses Markdown but the concept is very different and relies on Markdown files on disk and online in a Git repository. There are two components to this tool. One is a local Markdown Monster Addin that basically provides project features to tie together the Markdown files that otherwise just exist on disk. The KavaDocs Addin provides a table of contents and hierarchy and some base information about topics. Most of the topic related information is actually stored inside of the topic files as YAML data.

Files are stored and edited as plain Markdown files with topic content stored inside each of the topics. The Table of Contents contains the topics list to tie the individual topics together along with a few bits of other information like keywords, categories, related links and so on.

The other part to KavaDocs is an online application. It's a SAAS application that can serve this Markdown based documentation content dynamically via a generic Web service interface. You create a Web site like markdownmonster.kavadocs.com which then serves the documentation directly from a Github repository using a number of different nicely formatted and real-time switchable themes.

The concept here is very different in that the content is entirely managed on disk via plain Markdown files. The table of content pulls the project information together, and Git serves as the distribution mechanism. The Web site provides the front end while Git provides the data store.

The big benefit for this solution is that it's easy to collaborate. Since all documentation is done as Markdown text it's easy to sync changes on Git and any changes merged into the master branch are immediately visible as soon as a change is made. It's a really quick way to get documentation online.

White Papers and Articles like this one

These days I much prefer to write every I can in Markdown. So even for articles for print or even some online magazines, the standard for documents continues to be Word mainly because the review process in Word is well defined.

However, I like to write my original document with Markdown because I simply have a more efficient workflow writing this way, with real easy ways to capture images and paste them into documents for example. Markdown Monster's image pasting feature that also copies files to disk and optimizes them is just huge time saver as is the built in image capture integration using either SnagIt or a built-in capture. Linking to Web content too is much quicker with Markdown as is dealing with often frequently changing code snippets for technical articles. Belive me when I say that using Markdown can shave hours of document creation for me compared to using Word.

So for publications I often write in Markdown and then export the document to Word either using HTML rendering and importing the HTML, or by using PanDoc which is the Swiss Army knife of document conversions to convert my Markdown directly to Word. The conversions are usually really good, but they do need adjustments for the often funky paragraph formatting required for publishers.

In other cases like for this document, I can go directly to PDF output using my preferred template in Markdown Monster.

Generic Markdown Usage

Once you get the Markdown bug you'll find a lot of places where you can use Markdown. I love using Markdown for Notes, ToDo lists, keeping track client info, call logs, quick time tracking and other stuff.

here are a few examples.

Using Gists to publish Markdown Pages

Github has a related site that allows you to publish individual code snippets for sharing. Github Gist is basically a mini Git repository that holds one or more files that you can quickly post and share. It's great for sharing a code snippet on Twitter or other social network that you can then link to from a Tweet for example.

Gists are typically named as files and the file extension determines what kind of syntax coloring is applied to the snippet or snippet(s). One of the supported formats is Markdown which makes it possible to easily create Gists and write and publish an entire article.

publishing of Gists, which are essentially mini documents that can be posted as Code snippets on the Web. It's an easy way to share code snippets or even treat it like a simple micro blogging platform:

Gists can be shared via URL, and can also be retrieved via a simple REST API.

For example, Markdown Monster allows you to open a document from Gist using Open From Gist. You can edit the document in the local editor, then post it back to the Gist which effectively updates it. All this happens through two very simple JSON REST API calls.

One fly in the oinment to this approach is that images have to be linked as absolute Web URLs because there's no facility to upload images as part of a Gist. You can upload images to a Github image repo, Azure Blob storage or some similar mechanism to create your images as absolute URLs.

I love posting Gists for Code Samples. Although gists support posting specific language files (like foxpro or csharp files) I much rather post a Markdown document that includes the code and then describe more info around the code snippet.

Markdown for Everything? No!

Ok, so I've been touting Markdown as pretty awesome and I really think it addresses many of the issues I've had over the years of writing for publications, writing documentation or simply keeping track of things. Using Markdown has made me more productive for many text editing tasks.

But at the same time there are limits to what you can effectively do with Markdown at least to date. For magazine articles I still tend to need to use Word. Although I usually write my articles using Markdown, I usually have to convert them to a Word document (which BTW is easy via HTML conversion or even using a tool like PanDoc to convert Markdown to Word). The reason is that my editors work with Word and when all is said and done Word's Document Writer Review and Comparision are second to none. While you can certainly do change tracking and multi-user syncing by using Markdown with Git, it's not anywhere as smooth as what's built into Word.

There are other things that Markdown is not good for. When talking about HTML, Markdown addresses bulk text editing needs nicely. If you're editing an About page or Privacy Policy, Sales page etc. Markdown is much easier than HTML to get into the page. Even larger blocks of Html Text inside of larger HTML documents are a good fit for Markdown using what I call Markdown Islands. But Markdown is not a replacement for full HTML layout. You're not going to replace entire Web sites using just Markdown - you still need raw HTML for layout and overall site behavior.

In short, make sure you understand what you're using Markdown for and whether that makes sense. I think it's fairly easy to spot the edges where Markdown usage is not the best choice and also where it is. If you're dealing with mostly text data Markdown is probably a good fit. Know what works...

Markdown for Notes and Todo Lists

In addition to application related features, I've also found Markdown to be an excellent format for note taking and general notes. It's easy to create lists with Markdown text, so it's easy to open up a Markdown document and just fire away.

Here are some things I keep in Markdown:

General Notes

  • General Todo List
  • Phone Call Notes Document

Client Specific Notes

  • Client specific Notes
  • Client specific Work Item List
  • Client Logins/Account information (using MM Encrypted Files)

Shared Content - DropBox/OneDrive

  • Clipboard.md - machine sharable clipboard

Shared Access: DropBox or Git

First off I store most of my notes and todo items in shared folders of some sort. For my personal notes and Todo lists they are stored on DropBox in a custom Notes folder which has task specific sub-folders.

For customers I tend to store my public notes in Git repositories along with the source code (in a Documentation or Administration folder usually). Private notes I keep in my DropBox Notes folder.

Markdown Monster Favorites

Another super helpful feature in Markdown Monster that I use a lot is the Favorites feature. Favorites lets me pin individual Markdown documents like my Call Log and ToDo list or an entire folder on the searchable Favorites tab. This makes it very quick to find relevant content without keeping a ton of Markdown documents open all the time.

Summary

Markdown is simple tech which at the surface seems like a throwback to earlier days of technology. But - to me at least - the simpler technology actually means better productivity and much better control over the document format. The simplicity of text means I get a fast editor, easy content focused editing and as an extra bonus as a developer I get the opportunity to hack on Markdown with code. It's just text so it's easy to handle custom syntax or otherwise manipulate the Markdown document.

In fact, I went overboard on this and created my own Markdown Editor because frankly the tooling that has been out there for Windows really sucked. Markdown Monster is my vision of how I want a Markdown Editor to work. I write a lot and so a lot of first hand writing experience and convenience is baked into this editor and the Markdown processing that happens. If I was dealing with a proprietary format like Word, or even with just HTML, none of that would be possible. But because Markdown is just text there are lots of opportunities to manipulate both the Markdown itself in terms of (optional) UI editing experience as well the output generation. It's truly awesome what is possible.

this post created and published with Markdown Monster

Resources


Dynamically creating TabPages with the wwWebTabControl

$
0
0

The Web Connection Web Control Framework includes a Tab control, which is essentially a tab strip control. This means that the control itself manages the display of the strip, but doesn't internally manage creation of containers that are displayed as 'pages' for the actual content.


There have been a number of questions on how to dynamically create tab pages, which is not directly supported by the control. However the process to do so is relatively straight forward if you have a basic understanding of how the Web Control Framework works using containership to hold content.


So, to dynamically create tabs and tab pages you can start with a set up like the following in HTML markup:


<bodystyle="margin-top:0px;margin-left:0px">

    <formid="form1"runat="server">


    <ww:wwWebErrorDisplayrunat="server"id="ErrorDisplay"/>


    <h1>Tab Test</h1>


    <divclass="containercontent">

        <ww:wwWebTabControlrunat="server"ID="Tabs">       

        </ww:wwWebTabControl>


        <ww:wwWebPanelrunat="server"id="TabContainer"
                       OverrideNamingContainer="true">                

        </ww:wwWebPanel>

    </div>


    </form>

</body>


The highlighted controls are an empty Tab Control and a Panel, which will serve as a location to add additional pages in the form of panels.


To create tabs and pages dynamically you can now use code to add tabs to the tab control and panels to the tab container in the form of Panel controls.


*****************************************************************

* OnLoad

****************************************

FUNCTION OnLoad()


FOR lnX = 1 TO 5

      lcX = TRANSFORM(lnX)


      *** Start by adding a new tab

      this.Tabs.AddTab("Page " + lcX,"","Page" + lcX)


      *** Create a panel that will hold our content

      loPanel = CREATEOBJECT("wwWebPanel")

      loPanel.Id = "Page" + lcX

      loPanel.cssClass = "tabpage"


      *** Add some content to the panel

      *** Note you could also add a composite user control here

      loLabel = CREATEOBJECT("wwWebLabel")

      loLabel.Text = loPanel.id


      *** And add the label to the Panel

      loPanel.AddControl(loLabel)


      *** Add our new Panel to the TabContainer

      this.TabContainer.AddControl(loPanel)    

ENDFOR u

ENDFUNC

* Onload


The resulting display looks like this:


The code is pretty straight forward. It basically creates a new tab for each iteration of the for loop. It also creates a new panel as well via CreateObject("wwWebPanel") and we then add some content into that panel – a label in this case which is then added to the panel via AddControl. As you probably know the Web Control Framework is based on content containers that can hold content so everything you want to add to the page somehow must be a control. A label can hold anything – usually HTML or you can use literal controls for raw HTML if you don't want to style the text. But you can also add a more complex control into the panel – for example a user control that contains page content that was pre-created in the designer and with other controls/expressions embedded, or even a custom composite server control that generates meta driven data (which is what I'm doing at the moment with a customer and what brought this up). Lots of options for generating the content into the page.


Finally, once the panel's been created the new panel needs to be added to the page by call this.TabContainer.AddControl(loPanel) which completes the addition of the panel and its content to the page. AddTab() links to this panel via its third lcClientID parameter which then manages the initial display and activation of the tab page.


While this is not as easy as say adding a new page frame in a VFP desktop form it's not difficult either. Regardless of approach you still need to add controls to containers, so adding and extra Panel isn't really any more complicated.


Check this out – it's a great way for meta driven applications to add complex content to a page, potentially even dynamically as the content is needed.

A Few Thoughts on Web Connection and Security

$
0
0

A number of people have run into issues with PCI compliance due to a security bulletin that was put out on Web Connection some time ago. The issues in the bulletin have since been addressed in recent versions, but I thought I take the time to reiterate the importance of making sure that your Web Connection applications are secure.

The Security Bulletin Issues

Let’s start by addressing the Security Bulletin issues first.

XSS Attack

This cross site scripting issue has been fixed some time ago. I don’t remember the actual version number but the fix has been in recent versions of Web Connection. If you’re running version 5.x you can upgrade to the latest version, older versions can manually do a quick fix for this particular issue.

The issue is that on a failure request that tries to access a page Web Connection by default returns an error page that looks something like these:

http://www.west-wind.com/wconnect/wc.dll?wwdemo%3Cscript%3Ealert%28%27DANGER%20WILL%20ROBINSON%27%29;%3C/script%3E

http://www.west-wind.com/wconnect/wc.dll?wwdemo%22%3Cscript%3Ealert%28%27DANGER%20WILL%20ROBINSON%27%29;%3C/script%3E

The issue here is that West Wind Web Connection echo’s back the query string value it finds and in earlier versions this value was not properly sanitized. If not sanitized it’s possible to embed script into the URL and that script can execute in the browser.

As mentioned this has been fixed in current versions, so if you create a new project all’s well. You should see something like this:

UnhandledRequest

This properly encodes the offending input and simply echo’s it back. In the actual HTML the text is HtmlEncoded and looks like this:

..type of Request: WWDEMO&lt;SCRIPT&gt;ALERT('DANGER WILL ROBINSON');&lt;/SCRIPT&gt;

and so is safe.

However even if you are running the latest version but you have a main application class  (ie. MyAppMain.prg) you may still have this vulnerability in place! It’s an easy fix, but you still have to fix it. Find the Process() method in the MyAppMain.prg and the Process method. In it towards the bottom find the OTHERWISE clause and make sure the call the StandardPage() includes EncodeHtml() for encoding the lcParameter:

OTHERWISE*** Error - No handler available. Create custom Response=CREATE([WWC_RESPONSESTRING])Response.StandardPage("Unhandled Request",;"The server is not setup to handle this type of Request: "+ EncodeHtml(lcParameter))

This basically sanitizes the parameter and ensures it is turned into an HTML string rather than embedded as raw HTML text that can contain script.

There are several other places inside of West Wind Web Connection where similar routing errors echo back content but those locations are internal and have been fixed. If you have a pre-5.0 version of West Wind Web Connection you’ll want to look in wwProcess::RouteRequest (or wwProcess::Process() in older versions).

Note that although this fixes the West Wind Web Connection internal messages, there are still a few other places where this can be problematic, especially in your own code. Specifically some of the West Wind Web Connection demos that strive to show you some of the information available can potentially be used for XSS attacks as well, so on production sites it’s a good idea to remove the wwDemo project from the installation.

This also applies to your own code – anytime you take input from a query string there’s potential that the URL will be hacked and you have to be careful when echo that value back in the user interface. The universal and often tedious remedy for this is to use EncodeHtml() around text displayed to ensure that angle brackets (< >) are properly Html encoded and aren’t interpreted as html and script.

If you are going through PCI compliance especially, make sure you review your application and look for places where user input is DIRECTLY echo’d back. You’d be surprised how many places there actually are in your applications where this can occur.

XSS attacks are tricky because they don’t seem very dangerous and typically they aren’t unless you can force somebody to click on a corrupt link that includes script. The most common target of XSS attacks is to give up cookie and possibly confidential information (the latter is difficult to do, the former quite easy). It takes quite a bit of effort to ensure that all input you receive is sanitized, but that is a responsibility of your application. It has to decide what should be encoded and what shouldn’t.

It pays to think about this while you’re actually developing your applications and anticipate vulnerabilities. It’s much easier to fix at the time of creation rather than after the fact!

Administration Access

By default West Wind Web Connection ships with Administration access wide open, not requiring any security. Specifically this refers to the security setup in wc.ini which determines which account has access to the administration functions. The AdminAccount key in wc.ini controls this and by default it is shipped blank. I have now made a change in the default as of version 5.42 but I suspect this will cause more problems than it solves as people trying out the product for the first time are likely to be struggling with figuring out which login to use.

Anyway, Security is important and any site that goes live should have security enabled. To do so open up wc.ini and set the AdminAccount key:

;*** Account for Admin tasks    REQUIRED FOR ADMIN TASKS
;***       NT User Account   -  The specified user must log in
;***       Any               -  Any logged in user
;***                         -  Blank - no Authentication
AdminAccount=rstrahl,megger

You can use any valid Windows user account here or ANY to allow only non-anonymous access to the admin interface. The new default for new projects starting with Version 5.42 is ANY.

Note that this key controls access to the wc.dll admin functions as well as access to the ~wwMaint functions that are the FoxPro based administration links (show and clear logs, reindex system files etc.). These wwMaint process class also reads the security settings from wc.ini, although in wwMaint it’s possible to override the security behavior if you choose. The DLL access is limited to OS  Authentication.

Note that several people over the years have mentioned that they thought just removing the Admin page will protect them from anybody finding the wc.dll admin links. THIS IS NOT THE CASE. Anybody that knows the URLs can access the admin links so it is vital that every application you deploy has security set on the administration links in wc.ini!!!

Other Security Items you should implement

First off the help file has a fair bit on Security configuration of West Wind Web Connection here:

http://www.west-wind.com/webconnection/docs?page=_s8w0rmxwf.htm

and more to the point:

http://www.west-wind.com/webconnection/docs/_00716r7og.htm

You can read more detail there but I’ll highlight a couple of additional things that you’ll want to do:

  • Set ACL Permissions on Directories
    You’ll want to lock down any sensitive or administration directories by removing anonymous access in these folders of your application. Remove the IUSR_ account from these directories. Strip all directory access to the lowest access you really need – for West Wind Web Connection apps this typically means Read/Execute access. Remember West Wind Web Connection runs under either the active account when running in file mode or under the configured DCOM account. The only user that needs rights typically is just that account. So if you need to write files in the Web folder because you’re auto-generating images or reports for later pickup for example, you only need write access for the account West Wind Web Connection runs under.
  • Section your Site into Open and Locked Down Areas
    On too many occasions I’ve reviewed sites to find that Administrative features are intermixed with application level functionality and usually that’s a really bad idea. If you have administrative tasks that require elevated rights and access to sensitive features, make sure you isolate those features into separate folders and possibly separate West Wind Web Connection Process classes. This makes it much easier to administer security on these areas. Folders can be locked down with OS security and a single process class can handle security all in one place (like wwProcess::OnProcessInit or OnAuthenticate). This makes the security features isolated and maintainable in one or two places.
  • Use ScriptMaps – don’t use wc.dll
    This isn’t really a security item per se, but it affects site administration. By using script maps you’re not tying yourself to a specific implementation and you get much more control over links and how links are fired. Further script maps allow treating scriptmapped pages just like any other page and respect relative paths, something that wc.dll directly doesn’t do. ScriptMaps can also prevent direct access to admin functionality which further limits the security footprint of your . Additionally IIS 7 doesn’t allow execution of .dll files out of a bin directory any longer (unless you override the filter rule) and direct access to .DLL links requires additional rights configuration in IIS. ScriptMaps provide a safer way to access requests. If you are still calling wc.dll directly consider moving to script maps.

Security in Web application is a serious issue and it isn’t easy. Security is a process not something that you can easily slap on after the fact – thought needs to be given to security issues right from the start.

GAC Assemblies with wwDotnetBridge

$
0
0

wwDotnetBridge allows you to load random .NET assemblies from the local machine by explicitly referencing a DLL (assembly) file from disk.

It's as easy as using the LoadAssembly() method to point at the DLL, and you're off to the races:

loBridge = GetwwDotnetBridge()

*** load an assembly in your path
IF (!loBridge.LoadAssembly("Markdig.dll"))
   ? "Couldn't load assembly: " + loBridge.cErrorMsg
   RETURN
ENDIF   

loMarkdig = CREATEOBJECT("Markdig.MarkdownPipelineBuilder")
* ... off you go using a class from the assembly

Assemblies are found along your foxpro path, relative paths from your current path (.\subfolder\markdig.dll) or of course a fully qualified path.

GAC Assemblies

Things are a bit more tricky with assemblies that live in the Global Assembly Cache (GAC), which is a global registry of 'global' .NET assemblies. Although the GAC has lost a lot of its appeal in recent years with most components migrating to NuGet and local project storage as the preferred installation mechanism, most Microsoft assemblies are "GAC'd" and of course all the base framework assemblies all live in the GAC.

.NET assemblies that are signed have what is known as a Fully qualified assembly name which is the name by which any assembly registered in the GAC is referenced. To load an assembly from the GAC the preferred way to do that is to use this special name.

Here's what it looks like for loading the Microsoft provided System.Xml package for example:

loBridge.LoadAssembly("System.Xml, Version=4.0.0.0, Culture=neutral, PublicKeyToken=b77a5c561934e089")

The GAC is nothing more than a special folder in the C:\Windows\Microsoft.NET\assembly folder that is managed by the .NET Framework. This folder hierarchy contains assemblies that are laid out in a special format that ensures uniqueness of each assembly that lives in the GAC by separating out version numbers and sign hashes. Go ahead and browse over to that folder and take a look at the structure - I'll wait here. Look for some common things like System, System.Xml or System.Data for example.

wwDotnetBridge provides a few common mapping so you can just use the assembly name:

else if (Environment.Version.Major == 4)
{
    if (lowerAssemblyName == "system")
        AssemblyName = "System, Version=4.0.0.0, Culture=neutral, PublicKeyToken=b77a5c561934e089";
    else if (lowerAssemblyName == "mscorlib")
        AssemblyName = "mscorlib, Version=4.0.0.0, Culture=neutral, PublicKeyToken=b77a5c561934e089";
    else if (lowerAssemblyName == "system.windows.forms")
        AssemblyName = "System.Windows.Forms, Version=4.0.0.0, Culture=neutral, PublicKeyToken=b77a5c561934e089";
    else if (lowerAssemblyName == "system.xml")
        AssemblyName = c";
    else if (lowerAssemblyName == "system.drawing")
        AssemblyName = "System.Drawing, Version=4.0.0.0, Culture=neutral, PublicKeyToken=b03f5f7f11d50a3a";
    else if (lowerAssemblyName == "system.data")
        AssemblyName = "System.Data, Version=4.0.0.0, Culture=neutral, PublicKeyToken=b77a5c561934e089";
    else if (lowerAssemblyName == "system.web")
        AssemblyName = "System.Web, Version=4.0.0.0, Culture=neutral, PublicKeyToken=b03f5f7f11d50a3a";
    else if (lowerAssemblyName == "system.core")
        AssemblyName = "System.Core, Version=4.0.0.0, Culture=neutral, PublicKeyToken=b77a5c561934e089";
    else if (lowerAssemblyName == "microsoft.csharp")
        AssemblyName = "Microsoft.CSharp, Version=4.0.0.0, Culture=neutral, PublicKeyToken=b03f5f7f11d50a3a";
    else if (lowerAssemblyName == "microsoft.visualbasic")
        AssemblyName = "Microsoft.VisualBasic, Version=10.0.0.0, Culture=neutral, PublicKeyToken=b03f5f7f11d50a3a";
    else if (lowerAssemblyName == "system.servicemodel")
        AssemblyName = "System.ServiceModel, Version=4.0.0.0, Culture=neutral, PublicKeyToken=b77a5c561934e089";
    else if (lowerAssemblyName == "system.runtime.serialization")
        AssemblyName = "System.Runtime.Serialization, Version=4.0.0.0, Culture=neutral, PublicKeyToken=b77a5c561934e089";
}

which means you can just reference LoadAssembly("System.Web"). For all other assemblies however you have to use the fully qualified assembly name.

wwDotnetBridge internally references a number of assemblies so these don't ever have to be explicitly referenced:

Assemblies referenced by wwdotnetbridge

When do I need GAC References?

Earlier today I got a question from Alex Sosa asking about the fact that he had to reference a long path to a system specific location to find a GAC'd assembly to reference.

In this case he's trying to use the Powershell automation interface to talk to Powershell. The following code works, but it hardcodes the path the physical assembly:

loBridge = createobject('wwDotNetBridge', 'V4')

llReturn = loBridge.LoadAssembly('C:\Windows\Microsoft.Net\assembly\' + ;
'GAC_MSIL\System.Management.Automation\v4.0_3.0.0.0__31bf3856ad364e35' + ;
'\System.Management.Automation.dll')
if not llReturn
  messagebox(loBridge.cErrorMsg)
  return
endif 

* Create a PowerShell object.
loPS = loBridge.InvokeStaticMethod('System.Management.Automation.PowerShell','Create')

This code works, but it hard codes the path which is ugly and may change if the version is changed or if Windows is ever moved to a different location (like after a reinstall for example). It's never a good idea to hardcode paths - if anything the code above should be changed to use the GETENV("WINDIR") to avoid system specific paths.

Use Fully Qualified Assembly Names instead

But a a better approach with GAC components is to use Strong Assembly Names. Any GAC assembly has to be signed and as a result generates a unique assembly ID which includes its name, version and a hash thumbprint. You see part of that in the filename above.

Here's what this looks like:

llReturn = loBridge.LoadAssembly('System.Management.Automation, Version=3.0.0.0, Culture=neutral, PublicKeyToken=31bf3856ad364e35')

To get the fully qualified assembly name, you can use any Assembly Viewer tool like Reflector (which is what I use typically), JustDecompile from Telerik or you can use the Visual Studio assembly browser or ILSpy (also part of Visual Studio tools).

Any of these tools work, and here's what this looks like in Reflector:

You basically have to load the assembly into the tool, and then looks at the information properties for the assembly.

The advantage of the fully qualified assembly name is - especially for Microsoft assemblies - that the name rarely if ever changes (other than perhaps the version number). Even if the file name or even the actual file version changes, the assembly version and what's actually in the GAC is always correct with the fully qualified assembly name.

So rather than hardcoding a file name, which may change in the future you are now pinning to a specific version of a GAC entry, which tends to stay stable.

Summary

For GAC assemblies using fully qualified assembly names is the right way to go as this is the 'official' and fastest way .NET loads assemblies from the GAC.

Keep in mind though that even though the GAC is a global assembly cache, there's no guarantee that your assembly you are referencing is there. The Powershell assembly referenced above for example, may not be present if Powershell is not installed (it is an option in Windows Features even though it's on by default).

GAC assemblies are generally more problematic than loose assemblies due to their strong signing and stric dependency management rules, and luckily they are on their way out, so other than Microsoft system assemblies their use should be fairly rare these days with most third party assemblies being shipped as loose assemblies via NuGet packages which provides a lot more flexibility to developers.

But either way, wwDotnetBridge can load loose or GAC'd assemblies easily enough. Have at it!

Calling async/await .NET methods with wwDotnetBridge

$
0
0

I got a question on the message board a week ago regarding calling async .NET methods using wwDotnetBridge. My immediate suspicion was that this probably wouldn't be possible since async code on .NET usually uses generics and requires special setup.

However, as it turns out, you can call async methods in .NET with wwDotnetBridge. In this post I describe how async/await methods work in .NET and how you can call them from FoxPro with wwDotnetBridge.

How async/await works in .NET

The async and await pattern in .NET seems like magic - you make a request to a function that processes asynchronously, which means the code runs in the background and then continue processing the code as if it was running synchronously. async and await code looks and feels just like synchronous code but behind the covers, the code actually runs asynchronously.

.NET does this via some magic with the compiler that effectively re-writes you linear code into a state machine. That generated code essentially creates the dreaded async pyramid of doom that nobody wants to code up, but hides it behind generated compiler code - you never look at the series of continuations.

At a lower level, .NET uses the Task or Task<t> class API which is like a .NET version of a promise. Task is essentially task forwarder, that calls a method asynchronously, then handles the callback and provides a Result property that has a result value (if any). There are options to check completion status as well as methods that can wait for completion. In fact you can just choose to wait on .Result which is a blocking getter that won't return until the result returns.

Task is the low level feature - async and await is language sugar built around the Task object that essentially builds a state machine that waits for completion internally and includes checks and methods that can check the current state of the async request. Methods exist to wait for completion, to continue processing with the result (.ContinueWith() which is what async uses) as well as a .Result property that blocks until the result is available.

In essence, async and await chops up linear code into nested blocks code that continue in a linear fashion. For the developer the beauty of async await is that it looks and behaves mostly like linear code while running asynchronously and freeing up the calling thread.

An example of Async/Await in .NET

Let's say I want to make an HTTP call with System.Net.WebClient which has a number of async methods.

public async Task<string> MakeHttpCall(string url)
{
    var client = new WebClient();
    string http  = await client.DownloadStringTaskAsync(url);
    return http;
}

Remember the magic here - the compiler is doing a bunch of stuff to fix up this code. Note in order for asyncawait to work the method called has to be async to start with, which means the caller has to be calling asynchronously. Async await can be a real rabbit hole as it worms its way up the stack until reach a place where an Async method can be started (usually an event or server generated action). Another way to is to Task.Run() to kick of your own Task to kick of an async operation sequence.

Also note the compiler magic that makes it possible for the method to return Task<string>, but the code actually returning a string. Async methods automatically fix up any result type into a task so the string result becomes Task<string>.

To be clear when we want to call an async method from FoxPro, we can't use this same approach, but there are other ways to retrieve results from Async call in our non-async capable, event less Foxpro environment.

It's also possible to call async methods without using await. As seen above, an async method is really just a method that returns a Task. So WebClient.DownloadStringTaskAsync() - which is an async method that normally is called with asyncawait, can also be called like this:

public string MakeHttpCall(string url)
{
    var client = new WebClient();
    var task = client.DownloadStringTaskAsync(url); // returns immediately
    // waits until Result is available
    string http = task.Result;
    return http;
}

Here the code is directly working with the lower level Task API and it uses the .Result property to wait for completion. If .Result is not ready yet, retrieving .Result blocks and waits for completion of the async task before the value is returned.

This pretty much defeats the purpose of async since we end up waiting for the result, but keep in mind that you do have the option of running other code between the retrieval of the Task and getting the Result property.

This code looks like something that we can call with wwDotnetBridge.

Calling an Async method with wwDotnetBridge

And as it turns out we can in fact call DownloadStringTaskAsync() with FoxPro code just like this:

do wwDotNetBridge
LOCAL loBridge as wwDotNetBridge
loBridge = CreateObject("wwDotNetBridge","V4")

loClient = loBridge.CreateInstance("System.Net.WebClient")

*** execute and returns immediately
loTask = loBridge.InvokeMethod(loClient,"DownloadStringTaskAsync","https://west-wind.com")
? loTask  && object

*** Waits for completion
lcHtml = loBridge.GetProperty(loTask,"Result")
? lcHtml

And this works just fine.

Note that you have to call the async method indirectly with InvokeMethod() and you have to retrieve the Result value from the Task<T>Result using GetProperty(). This is required because both the method and the result property use .NET generics and those can't be called directly through COM interop and require wwDotnetBridge's indirect processing. But it works! Yipiee!

wwDotnetBridge - More that you think!

I was pretty convinced that this wasn't going to work, but in hindsight it makes perfect sense that it does. Async methods are just methods that return a Task object, which can be accessed and manipulated like any other object in .NET and therefore with wwDotnetBridge. The main consideration for wwDotnetBridge is that Task<t> is a generic type and requires indirect access using InvokeMethod() to call the async method, and using GetProperty() to retrieve the Result property.

Be careful

All that said, I'm not sure if it's a great idea to actually do this. Async methods run in the background and potentially on background threads and Microsoft strongly recommends you don't use .Result to wait for completion. They are of the "don't call us we call you!" persuasion, by using ayncawait, or by using Task continuations (ie. .ContinueWith(result) which is something we can't do directly with wwDotnetBridge (can't create delegates).

However, if you are running inside of FoxPro over COM (as we are with wwDotnetBridge) there's already thread marshalling happening that should prevent any thread conflicts from manifesting with async code. Running a few tests firing off 10 simultaneous requests and collecting them seems to work reliably even for long runs. Still make sure you test this out to make sure you don't run into thread lock up or corruption. Check, test and be vigilant if you go down this path.

So there you have it: Task Async methods with wwDotnetBridge are possible. More APIs to connect with for FoxPro. Rock on!

this post created and published with Markdown Monster

Locking down the West Wind Web Connection Admin Page

$
0
0

The West Wind Web Connection Administration page is a powerful page that is the gateway to administration of the West Wind Web Connection server that is executing. But you know the saying:

With great power, comes great responsibility!

And that's most definitely true for the Admin page.

The Admin page has a very important role, but it's crucially important that this page is completely locked down and not accessible by non-authenticated users.

You don't ever want to come to an old Web Connection Administration page on a live Web site and have it look like this:

If you see this or something similar on a live site, the administration page is wide open for anybody to access and that's a big problem.

The page above comes from an actual site on the Internet and it makes me sad to see this, because you have to go out of your way to make this happen and willfully disable security. Unfortunately, this is not uncommon to see.

I was contacted of the weekend by a security researcher, Ken Pyle of DFDR Consulting LLC, who notified me that he's run into a lot of sites with this problem and he provided a number of links.

And he's not wrong!

To be clear: Pages like this have a very obvious message that tells you what the problem is, namely that the page is not secured, so a lot of this is shoot yourself in the foot syndrome where somebody has willfully ignored the message or worse removed the associated security that gets put in place if you use the Web Connection tooling to configure a Web site.

If you install Web Connection properly either following the manual configuration guide or using the automated tools (yourApp_ConfigureServer.prg or Console Web Site Configuration Wizard in older versions) the installation will be locked down, by removing anonymous access for the IUSR_ and Users account, so that at least a login of some sort is required to get to the admin page.

Changes in 6.19's Admin Page

In Web Connection v6.19 we've made some additional simple changes to the Admin page that make it much harder to accidentally expose the admin interface on a public Web site.

Two changes in particular:

  • Links and Content no longer displayed on unauthenticated remote requests
  • Removed the Process List Viewer display

If you access the page unauthenticated from any non-localhost computer and you are not authenticated you will now see:

If you do authenticate and get in the Process list shown in the previous screen shot is no longer available. Most of that functionality has been available in the Module Administration Page more specifically focused on the running application server instances.

If you can't use or upgrade to Web Connection 6.19, you can download the updated Admin.aspx and old Admin.asp pages from this zip file:

Lock it down!

Regardless of this 'safe by default fix', it's extremely important that you lock down this page by explicitly removing access rights for non-authenticated users.

In this post I'll show you how to do this as a refresher, but I also recommend you look at the documentation for Securing your Web Connection Installation.

What about Web Connection Admin Links

The Admin Page is really mostly a list of links, that points at Web Connection Server operations to manage the server lifetime. These links are also security sensitive obviously.

But Web Connection administration requests like ReleaseComServers.wc or wc.wc?__maintain~ReleaseComServers are already locked down by default via the AdminAccount configuration setting in web.config or wc.ini with by default is set to ANY which means it requires any authenticated and refuses access by non-authenticated users. So these links are locked out by default, although - just like the Admin page - they can be unset and opened up. Don't do it - don't be the shoot-yourself-in-the-foot guy that unsets the setting and forgets to put it back. Always leave at least the base security in place.

Automated Security Configuration

The biggest problem that causes the security issue is that IIS and Windows security isn't set up properly by the servers in question. If you use the Web Connection configuration tooling it automatically does the right thing and has always been doing so.

Web Connection provides tools to help you with site configuration, and these tools do the right thing for security configuration by default. We highly recommend you configure your site using the automated tools provided for this purpose which are:

Using the server configuration script is the recommended way to do this and you can customize this script with any additional configuration your application may need. By default the configuration script is compiled into your Web Connection server EXE and can be accessed with the following from a Windows Admin Prompt:

YourApp.exe CONFIG

For more information:

Remove IUSR Access

While the new Admin page fixes the basic issue of allowing access to the Admin page, it's still important to revoke access to the entire Admin folder for all unauthenticated users.

The easiest way to do this is to remove or Deny access to the IUSR account for the Admin folder in Windows:

Doing this alone will prevent access, but this is an explicit step. The new Admin page addresses the issue if you forget to set security, but it's still strongly recommended you remove IUSR!

Manually Updating Admin.aspx

The 6.19 update to the Admin.aspx does two things:

  • Doesn't allow Remote Access that is unauthenticated
  • Removes the Process Listing Table

Let's do these steps manually.

Disallow Unauthenticated Remote Access

You can replace the section that shows the warning dialog in Admin.aspx with the following updated code that adds an additional remote site check and ends the response if the local and remote ips don't line up.

Here's the relevant code:

<%  
  string user = Request.ServerVariables["AUTH_USER"];
  string remoteIp = Request.ServerVariables["REMOTE_ADDR"];
  string localIp = Request.ServerVariables["LOCAL_ADDR"];           
  if (string.IsNullOrEmpty(user))
  { 
%><div class="alert alert-warning"><i class="fa fa-exclamation-triangle" style="font-size: 1.1em; color: firebrick;"></i><b>Security Warning:</b> You are accessing this request unauthenticated!<div style="border-top: solid 1px silver; padding-top: 5px; margin-top: 5px; "><p>
            You should enable authentication and remove anonymous access to this page or folder.<small><a href="https://west-wind.com/webconnection/docs/_00716R7OG.HTM">more info...</a></small></p><% if(localIp != remoteIp)  { %><p style="color:red; font-weight: bold">
            You are not allowed to access this page without authentication from a remote address.
            Aborting page display...</p><% } else { %><p style="color:red; font-weight: bold">
            NOTE: You are allowed to access this page, because you are accessing it from the
            local machine, but it won't work from a remote machine.</p>   <% } %></div></div><% 
    if(localIp != remoteIp)
    {
        Response.End();
    }            
} 
%>

Remove the Process List Table

The Machine Process List is a relic of earlier versions of Web Connection when the management features were less fleshed out. Today's Web Connection can perform these tasks much cleaner using the Module Administration page.

Remove the Process List table and edit form from Admin.asxp (and in a similar way in Admin.asp).

Remove the following:

<div class="well well-sm"><form action='' method='POST'>
            Exe file starts with: <input type='text' id='exeprefix' name='exeprefix' value='<%= this.Show %>' class="input-sm" /><button type='submit' class="btn btn-default btn-sm"><i class="fa fa-refresh"></i>
                Refresh</button></form></div><table class="table table-condensed table-responsive table-striped" ><tr><th>Process Id</th><th>Process Name</th><th>Working Set</th><th>Action</th></tr><%      
            System.Diagnostics.Process[] processes = this.GetProcesses();
            foreach (System.Diagnostics.Process process in processes)
            {
        %><tr><td><%= process.Id%></td><td><%= process.ProcessName%></td><td><%= (process.WorkingSet / 1000000.00).ToString("n1") %> mb</td><td><a href="admin.aspx?ProcessId=<%= process.Id %>" class="hoverbutton"><i class="fa fa-remove" style="color: firebrick;"></i> 
                Kill</td></tr><%
}
        %>            </table>

Also remove the block of script code on the bottom of the Admin.aspx page, which was used for helper purposes to the process list table above.

Again you can find the latest versions of these files in Web Connection 6.19 or you can download the updated Admin pages:

Update to the Latest Version of Web Connection

If you're already on Web Connection 6.0 I highly recommend you update a version of 6.19 or later and copy the Admin.aspx page from the \templates\ProjectTemplate\Web\Admin folder into your Web Application(s).

I can't overstate this: Even if you have an application that's been running for a long time, it's a good idea to keep up with versions in order to take advantage of security updates and bug fixes. There are many feature improvements in newer version, but being current also means it's much easier to update to later versions. Web Connection's core engine hasn't drastically changed since Version 5.0 more than 10 years ago, so updates are almost always drop in replacements - there are only a handful of documented breaking changes.

I realize there are a lot of very old (I ran into several 3.x applications that are 20+ years old by now), but if you have old applications running you need to be pro-active and make sure that they are still doing what they should and that they are secure. Making this sort of jump to the current version is probably unrealistic, but if you're running a recent version of WWWC 5 at least updating to 6.x is relatively minor. Moving from 4 to 6 is a little more involved but still can be accomplished relatively easily with a little effort. If you decide to upgrade Web Connection from a previous prior to v6.0, here is a little incentive with a 10% discount coupon:

Being on a recent version provides the ability to update to the most recent versions makes it much easier to keep up with changes and fixes, and you can use the changelog to see what's updating and what's being fixed with important and breaking changes highlighted.

Nevertheless, I'll discuss the fix below, so if you're using a pre-6.x version of Web Connection you can manually update your Admin.aspx and the pre-6.0 Admin.asp pages.

Resources

I want to also thank Ken Pyle for bringing this issue to my renewed attention and providing the motivation for updating the default implementation to reject unauthenticated access from remote sources by default.

Ken Pyle
DFDR Consulting LLC
Digital Forensics, Incident Response, Cyber Security
www.dfdrconsulting.com

Links

this post created and published with Markdown Monster

Testing a Web Connection COM Server with FoxPro or PowerShell

$
0
0

This is a quick tip to a question that comes up frequently when testing runtime installations:

How can I quickly test whether my COM server is properly installed and working on a live server where I don't have the full Visual FoxPro IDE installed?

If you recall when you install Web Connection on a live server the preferred mode of operation is by using COM Mode where Web Connection servers are running as COM objects. If you ever run into a problem with a COM server not loading the first thing you want to do is check whether the COM server can be loaded outside of Web Connection either using a dedicated FoxPro IDE installation or if you only have the FoxPro Runtimes available using PowerShell.

Registering your COM Server

The first step for COM servers on a new server is that that they have to be registered in the Windows Registry. When you build during development Visual FoxPro automaqtically registers the COM server during build, but on a live server install you manually have to install the server.

Assuming you have an EXE server called MyApp you have to do the following under an Admin account to register the server:

MyApp.exe /regserver

The /regserver Switch produces no Output

One problem with the /regserver switch is that it gives absolutely no feedback. You run it on your EXE and it looks like nothing happened regardless of whether it succeeded or failed. No output, no dialog - nothing.

Note that if you're using the YourServer_Config.prg or Youserver.exe CONFIG self-configuration, that will automatically register your server by running the above command for you.

Once that's done you typically have a COM server registered as MyApp.MyAppServer.

Re-Register COM Servers when the Server Interface Changes

Note that COM server registration is always required on first installation, but also when you make changes to the public COM interface of the server. COM registration writes ClassIds, ProgIds and Type library information into the registry and if the COM interface changes these ids often change along with the interface signatures. So remember to re-register your servers whenever properties or methods on the Server class are added or changed.

Testing the Server

So, to test the server and see if it's actually working, you can do the following using FoxPro code:

loServer = CREATEOBJECT("MyApp.MyAppServer")
? loServer.ProcessHit("")   && produces an error HTML page if it works

This produces an error page with a 404 Not Found header because no path was passed. This is usually all you need to check whether the server can load and run. It's easy to run and remember.

If you want to see a real response from the server you can instead specify a physical path to the request. For example, to test the Web Connection sample server I can do:

loServer = CREATEOBJECT("wcDemo.wcDemoServer")
? loServer.ProcessHit("&PHYSICAL_PATH=c:\wconnect\web\wconnect\testpage.wwd")
loServer = null

which should produce the output of the testpage.

Note it'll depend on the URL you hit whether additional parameters like query strings, form variables or other URL parts are required, but if you fire a simple GET request it should typically work.

No FoxPro Installation? Use PowerShell

On a live server however you often don't have the FoxPro IDE installed, so if you want to test a COM server you can't use FoxPro code. However, Windows Powershell can instantiate COM objects (and also .NET objects) and so we can use a powershell script to test the server.

$server =  new-object -comObject 'yourProject.yourProjectServer'
$server.ProcessHit("")

This should produce an HTML error page with an HTTP 404 response header that says page not found.

If you want to test a 'real' request, you can provide a physical path - here again using the Web Connection sample server as an example:

$server =  new-object -comObject 'wcDemo.wcDemoMain'
$server.ProcessHit("&PHYSICAL_PATH=c:\wconnect\web\wconnect\testpage.wwd")

# release the server (optional)
[System.Runtime.Interopservices.Marshal]::ReleaseComObject($server) | Out-Null

Note the rather nasty syntax to release a COM server from memory. Alternately you can shut down the PowerShell session to release the object as well.

Summary

Testing COM objects on an installed server is something that is often needed if you are troubleshooting an installation. A FoxPro installation is easiest, but if you only have a runtime install the PowerShell option is a good and built-in alternative.

Test Post

$
0
0

This is a very simple test post.


Test Post

$
0
0

This is a very simple test post.

Test Post

$
0
0

This is a very simple test post.

West Wind Web Connection 7.0 has been released

$
0
0

The final build of Web Connection was released today and is available for download now. You can grab the latest shareware version from the Web Connection Web site:

Upgrades are available at:

Version 7.0 is a major update that includes many enhancements and optimizations.

Here's a list of all that has changed and been added:

What follows is a lot more detail on some of the details of some of the enhancements.

Focus on Streamlining and Consolidation

This release continues along the path of streamlining relevant features and making Web Connection easier to operate during development and for deployment. As most of you know Web Connection is a very mature product that has been around for nearly 25 years now (yes the first Web Connection release shipped in late 1994!) and there is a lot of baggage from that time that is no longer relevant. A lot of stuff has of course been trimmed over the years and this version is no different.

This release consolidates a lot of features and removes many libraries that hardly anyone uses - certainly not in new project - by default. The libraries are still there (in the \classes\OldFiles folder), but they are no longer loaded by default.

The end result is a leaner installation package of Web Connection (down to 20 megs vs. 35 megs) and considerably smaller base applications (down to ~700k vs 1.1meg).

Removing VCX Casses in favor of PRG Classes

One thorn in my personal side, has been that Web Connection included a few VCX classes, specifically several VCX classes that don't really need to be visual. wwSql, wwXml, wwBusiness and wwWebServer all were visual classes that have now been refactored into PRG classes.

This is a breaking change that requires changing SET CLASSLIB TO to SET PROCEDURE TO for these classes using a Search and Replace operation.

wwBusiness is a special case as it can and often was used with Visual Classes for subclassing. So, wwBusiness.vcx still exists in the OldFiles folder, but there's a new wwBusinessObject class and wwBusinessCollectionList class that replaces it. If you already used PRG based business object subclasses then it's a simple matter of replacing the SET CLASSLIB TO wwBusiness with SET PROCEDURE TO wwBusinessObject and replacing AS wwBusiness with AS wwBusinessObject.

For visual classes you can either continue to use the VCX based wwBusiness class, or - better perhaps - extract the code of each class to a PRG file using the Class Browser and deriving classes off wwBusinessObject. For visually dropped classes that were dropped on a form or container that code would also need to be replaced with THISFORM.AddProperty(oBusObject,CREATEOBJECT("cCustomer")) and so on.

VCX Class to PRG Class Migrations

Bootstrap 4 and FontAwesome 5

Other highlights in this update include getting the various support frameworks up to date.

Web Connection 7.0 ships with Bootstrap 4 and FontAwesome 5 (free) support which updates the original versions shipped in Web Connection 6 more than 4 years ago. This is one thing that's troublesome in Web applications: Client side frameworks change frequently and as a result anything that depends on them - including a tool like Web Connection - also has to update. This process is not difficult but it is time consuming as there are a handful of places in the framework (mainly the wwHtmlHelpers) where there are dependencies on some of these UI framework specific features.

That said, having upgraded 3 different applications to Bootstrap 4 and FontAwesome 5 I can say that the process is relatively quick if you decide to upgrade. 95% of the work is search and replace related, while the remaining 5% is finding specific UI constructs and updating them (mainly related to change in Bootstrap 4's use of Card vs. panels, wells, tooltips etc.).

While it's a nice to have feature to upgrade to the latest version of UI frameworks and keep up to date with new styles and UI framework features, it's also important to understand that you don't have to upgrade to the new UI Frameworks. If you have an app that runs with Bootstrap 3/FontAwesome 4 you can continune to use those older UI frameworks - using Web Connection 7.0 isn't going to break your application.

Migration from Bootstrap 3 to 4 in the documentation.

Project Management Improvements

One of the most important focal points of this update and many changes since v6.0 have been around making Web Connection Projects easier to create, run, maintain and deploy. Web Connection 7.0 continues to make things easier and quicker and hopefully more obvious for someone just getting started.

Fast Project Creation - Ready to Run

To give you some perspective here, I use the project system constantly when I need to test something out locally. When I see a message on the message board with a question to some feature it's often easier for me to just create a new project quickly and push in a few changes than even pull a demo project and add features. Creating a new project takes literally a minute and I have a running application.

There's a new Launch.prg file that is generated that automates launching a project consistently, regardless of which project you're in.

The process now literally is:

  • Use the Console
  • Run the New Project Wizard
  • DO Launch.prg

The browser is already spun up for you and additional instructions on how to launch either IIS or IIS Express are displayed on the screen.

Launch.prg is a new file generated by the new project wizard which basically does the following:

  • Calls SetPaths.prg to set the environment
  • Opens the browser to the IIS or IIS Express Url
  • If running IIS Express launches IIS Express
  • Launches your Web Connection Server instance
    using DO <yourApp>Main.prg

You can do this to launch with IIS:

DO Launch

which opens the application at http://localhost/WebDemo (or whatever your virtual is called).

To launch for IIS Express:

DO Launch with .T.

which is a flag that launches IIS Express and changes the URL to http://localhost:7000. This is a configurable script so you can add other stuff to it that you might need at launch time.

Here's what this script looks like for the WebDemo project.

********************************************
FUNCTION Launch
***************
LPARAMETER llIISExpress

CLEAR

*** Set Environment
*** Sets Paths to Web Connection Framework Folders
DO SETPATHS

lcUrl = "http://localhost/WebDemo"

IF llIISExpress
   *** Launch IIS Express on Port 7000
   DO CONSOLE WITH "IISEXPRESS",LOWER(FULLPATH("..\Web")),7000
   lcUrl = "http://localhost:7000"
ENDIF

*** Launch in Browser
DO CONSOLE WITH "GOURL",lcUrl
? "Running:" 
? "DO Launch.prg " + IIF(llIISExpress,"WITH .T.","")
?
? "Web Server used:"
? IIF(llIISExpress,"IIS Express","IIS")
?
IF llIISExpress
   ? "Launched IISExpress with:"
   ? [DO console WITH "IISExpress","..\Web",7000]
   ?
ENDIF

? "Launching Web Url:" 
? lcUrl
? 
? "Server executed:"
? "DO WebdemoMain.prg"

*** Start Web Connection Server
DO WebdemoMain.prg

This makes it really easy to launch consistently, and for any project and whether you are running with full IIS or IIS Express.

Even if you're running an old project I encourage you to add a Launch.prg for an easier launch experience. I've been doing this for years but manually, and now that process is automated.

Launch.prg also prints out to the desktop what it's doing. It tries to be transparent so you don't just see the black box but you can see the actual commands and steps to get your app up and running easily and to allow you launch even if you don't use Launch.prg. The goal is to help new users understand what's actually going on while at the same time making things much easier and more consistent to run.

BrowserSync.prg - Live Reload for Server Code

BrowerSync is a NodeJs based tool that can automatically reload the active page in the Web browser when you make a change to a file in your Website. The idea is that you can much more quickly edit files in your site - especially Web Connection Scripts or Templates - and immediately see the change reflected in the browser without having to explicitly navigate or refresh the browser.

Using BrowserSync you can have your code and a live browser window side by side and as you make changes and save, you can immediately see the result of your change reflected in the browser. It's a very efficient way to work.

When you create a new project, Web Connection now creates a BrowserSync.prg that's properly configured for your project. Assuming browser-sync is installed, this file will:

  • Launch Browser Sync on the Command Line
  • Navigate your browser to the appropriate site and port
  • Start your FoxPro server as a PRG file (DO yourAppMain.prg)

There's more information on what you need to install BrowserSync in the documentation:

Using BrowserSync during Development to Live Reload Changes

New Project Automatically Create a GIT Repository

If Git is installed on the local machine the new Project Wizard now automatically sets up Git Repository and makes an initial commit. New projects include a FoxPro and Web Connection specific .gitignore and .gitattributes file.

This is very useful especially if you just want to play around with a project as it allows you to make changes to the newly created project and then simply rollback to the original commit to get right back to the original start state.

It's also quite useful for samples that update existing applications. For example, I recently created the User Security Manager and using the intial commit and the after integration Git lets you see very easily exactly what changes the update integration Wizard makes to get the new project running.

As a side note, Web Connection projects are very Git friendly since they typically don't include VCX files. With the v7.0 changes away from VCX wwBusiness, the last vestige of visual classes has been removed. If you use visual classes you'll need some additional tooling like FoxBin2Prg to convert visual classes to text that Git can work with for comparison and merging.

Code Snippets for Visual Studio and Visual Studio Code

Another big push in this release has been to improve integration into Development IDE's. Web Connection 7 now ships with a number of Intellisense code snippets for Visual Studio and Visual Studio Code. In both development environments you now have a host of code snippets that start with wc- to help inject common Web Connection Html Helpers as well as common HTML and Bootstrap constructs and full page templates (ie. wc-template-content-page).

In Visual Studio:

And in Visual Studio Code:

The Visual Studio Add-in also has a number of enhancements that allow hooking up an alternate code editor to view your process class code (I use Visual Studio Code for that these days).

Fixing a Script Page Path Dependency

Another highlight for me is that Web Connection Script pages that use Layout pages no longer hard code the script page path into the script page. This fixes a long standing issue that caused problems when you moved script files and specifically compiled FXP files between different locations.

In v7.0 the hard coded path is no longer present which means you can now compile your script pages on your dev machine and ship them to the server without worry about path discrepancies.

The old code used to do this sort of thing:

The result of this was that you'd get content page PRG files that had something like this:

LOCAL CRLF
CRLF = CHR(13) + CHR(10)

 pcPageTitle = "Customers - Time Trakker" 

 IF (!wwScriptIsLayout)
    wwScriptIsLayout = .T.
    wwScriptContentPage = "c:\webconnectionprojects\timetrakker\web\Customers.ttk"
    ...
ENDIF

The hard coded path is now replaced by a variable that is passed down from the beginning of the script processing pipeline which is ugly from a code perspective (a non-traceable reference basically), but clearly preferrable over a hardcoded path generated at script compilation time.

It's a small fix, but one that actually has caused a number of mysterious failures for many people that was difficult to track down because it would tell you that the script was not found even though the path presumably was correct.

So yes, this a small but very satisfying fix...

Markdown Improvements

There are also a number of improvements related to Markdown processing in Web Connection. You probably know that Web Connection ships with a MarkdownParser class that has a Markdown() method you can use to parse Markdown into HTML. The MarkdownParser class provides additional control over what features load and what processing options are applied, but in essence all of that provides basic Markdown parsing features.

Web Connection 7.0 adds default support HTML Sanitation of the generated HTML content. Markdown is a superset of HTML so it's possible to embed script code into Markdown, and SanitizeHtml() is now hooked into the Markdown processor by default to strip out any script tags, JavaScript events and javascript: urls.

SanitizeHtml() is now also available as a generic HTML sanitation method in wwUtils - you can use it on any user captured HTML input to strip script code.

Web Connection 7.0 also includes a couple of new Markdown Features:

  • Markdown Islands in Scripts and Templates
  • Markdown Pages that can just be dropped into a site

Markdown Islands

Markdown Islands are blocks of markdown contained inside of a <markdown></markdown> block and is rendered as Markdown.

You can now do things like this:

<markdown>
   Welcome back <%= poModel.Username %>

   ### Your Orders
   <% 
      SELECT TOrders 
      SCAN
   %>
      **<%= TOrders.OrderNo %>** - <%= FormatValue(TOrders.OrderDate,"MMM dd, yyyy") %><% ENDSCAN %></markdown>

You can now embed script expressions and code blocks inside of Markdown blocks and they will execute.

Note that there are some caveats: Markdown blocks are expanded prior to full script parsing and any Markdown that is generated is actually embedded as static text into the page. The script processor then parses the rendered markdown just like it does any other HTML markdown on the page.

Markdown Pages

Markdown Pages is a new feature that lets you drop any .md file into a Web site and render that page as HTML content in your site - using the default

This is a great feature for quickly creating static HTML content like documentation, a simple blog, documents like about or terms of service pages and so on. Rather than creating HTML pages you can simple create a markdown document and drop it into the site and have it rendered as HTML.

For example, you can simply drop a Markdown file of a blog post document into a folder like this:

http://west-wind.com/wconnect/Markdown/posts/2018/09/25/FixWwdotnetBridgeBlocking.md

which results in a Web page like this:

All that needs to happen to make that work is dropping a markdown file into a folder along with its dependent resources:

You can customize how the Markdown is rendered via a Markdown_Template.wcs script page. By default this page simply renders using nothing more than the layout page as a frame with the content rendered inside of it. But the template is customizable.

Here's what the default template looks like:

<%
    pcPageTitle = IIF(type("pcTitle") = "C", pcTitle, pcFilename)
%><% Layout="~/views/_layoutpage.wcs" %><div class="container"><%= pcMarkdown %></div><link rel="stylesheet" href="~/lib/highlightjs/styles/vs2015.css"><script src="~/lib/highlightjs/highlight.pack.js"></script><script>
    function highlightCode() {
        var pres = document.querySelectorAll("pre>code");
        for (var i = 0; i < pres.length; i++) {
            hljs.highlightBlock(pres[i]);
        }
    }
    highlightCode();</script>

Three values are passed to this template:

  • pcTitle - the page title (parsed out from the document via YAML header or first # header)
  • pcFileName - the filename of the underlying .md file
  • pcMarkdown - the rendered HTML from the Markdown text of the file

Authentication and Security Enhancements

Security has been an ongoing area of improvement in Web Connection. Security is hard no matter what framework you use and Web Connection is no exception. Recent versions have gained many helper methods that make it much easier to plug in just the component so of the authentication system that you want to hook into or replace.

In this release the focus has been in making sure that all the authentication objects are in a consistent state when you access them. If you access cAuthenticatedUser, lIsAuthenticated, cAuthenticatedUsername, oUserSecurity and oUser and so on, Web Connection now makes sure that the current user has been validated. Previously it was left up to the developer to ensure that either Authenticate() or OnCheckForAuthentication() was called to actually validate the user and ensure the various objects and properties are set.

In v7.0 when you access any of these properties an automatic authentication check is performed that ensures that these objects and values are properly checked before you access them without any explicit intervention by your own code.

Another new feature is auto-encryption of passwords when the cPasswordEncryptionKey is set. You can now add non-encrypted passwords into the database and the next time the record is saved it will automatically encrypt the passwords. This allows an admin user the ability to add passwords without having to pre-hash them and it also allows legacy user security tables to automatically update themselves to encryption as they run.

New User Security Manager Addin Product

In parallel with the release of Web Connection 7.0 I'm also releasing a separate product, the User Security Manager for Web Connection which provides a complete user authentication and basic user management process as an addin Web Connection process class. The addin process class takes over all authentication operations besides the core authentication which is shared between your application process class(es).

The Security Manager is a drop in process class which means all the logic and code related to it is completely seperate from your application's process class(es). All authentication operations like sign in, sign out, account validation, password recovery, profile creationg and editing and user management are all handled completely independently.

In addition the library provides the base templates for enhanced login, profile editing, password recovery, account validation and the user manager. These templates are standard Web Connection script pages and they are meant to be extended if necessary with your own custom fields that relate to your user accouts.

You can find out more on the USer Security Manager Web site:

User Security Manager for Web Connection

What about breaking changes?

As I mentioned whenever these large upgrades become due we spend a bit of time to find the balance between new features, refactoring out unused features and breaking backwards compatibility.

Given the many enhancements and features in this v7.0 release the breaking changes are minimal, and for the most part require only simple fixes.

The core areas are:

  • Bootstrap and FontAwesome Updates in the Templates
  • VCX to PRG Class Migrations
  • Deprecated classes

Out of those the HTML Bootstrap update is easily the most severe - the others are mostly simple search and replace operations with perhaps a few minor adjustments.

There's a detailed topic in the help file that provides more information on the breaking changes:

Breaking Changes: Web Connection 7.0 from 6.x

More and more

There's still more and to see a complete list of all the changes that have been made check out the change log:

Web Connection Change Log

Summary

As you can see there's a lot of new stuff, and a lot of exciting new functionality in Web Connection 7.0. I'm especially excited about the project related features and easier launching of applications, as well as BrowserSync, which I've been using for the last month and which has been a big productivity boost.

So, check out Web Connection 7.0 and find your favorite new features.

this post created and published with Markdown Monster

Startup Error Tracing in West Wind Web Conection 6

$
0
0

Web Connection 6.0 and later has made it much easier to create a predictable and repeatable installation with Web Connection. It's now possible to create a new project and use the built-in configuration features to quickly and reliably configure your application on a server with yourApp.exe CONFIG from the command line.

This produces a well-known configuration that creates virtuals, scriptmaps and sets common permissions on folders. The configuration is a PRG file that you can customize so if you need configure additional folders, set different permissions or copy files around as part of config - you can do that.

Using the preconfigured configuration should in most cases just make your servers work.

But we live in an imperfect world and things do go bump in the night - and so it can still happen that your Web Connection server won't start up. There are many reasons that this can happen from botched permissions on folders or DCOM to startup errors.

In this post I want to talk about server startup problems - specifically FoxPro code startup errors (rather than system startup errors due to permissions/configuration etc.).

One of the most common problems people run into with Web Connection application startup errors. You build your application on your development machine, then deploy it on a live server and boom - something goes wrong and the server doesn't start.

Now what?

File Server Startup Errors

Even if you're running in COM mode if you have startup problems with your COM server it's often a good idea to first switch the COM server into File mode, then run as a file mode applications.

If you are running in file mode it's often easier to find startup problems, because you tend to run the application in interactive mode which means you get to see errors pop up in the FoxPro Window.

If you run into issues here you can also double check your development code to see if you can duplicate the behavior. Make sure your local application works obviously, but that's the first line of defense: Make sure the error is indeed specific to your server's environment. If it's not by all means debug it locally and not on the server.

Test Locally First

This should be obvious: But always, always run your server locally first, with an environment as close as possible to what you are running on the server. Run in file mode make sure that works. Run in COM Mode make sure that works. Simulate the user environment you will use on the server locally (if possible) and see what happens.

Always make sure the app runs locally first because it's a heck of a lot easier to debug code on the development machine where you can step through code, than on a server where you usually cannot.

COM Server Startup Errors

Startup errors tend to fall into two categories:

  • System Startup Errors
  • FoxPro Server Startup Errors

System errors are permissions, invalid progIds, DCOM misconfigurations etc. that outright make your server fail before it ever gets a chance to be instantiated. These are thorny issues, but I'm not going to cover them much here. That'll be topic for another post.

The other area is server startup errors in FoxPro code. These errors occur once the server has been instantiated and initialized and usually occur during the load phase of the server.

Understanding the Startup Sequence: Separated OnInit and OnLoad Sequence

When Web Connection starts up your application in a non-debug compiled EXE COM server, error handling is not initially available as the server initializes. That's because the server initializes as part of an OnInit() sequence and if that fails, well... your server will never actually become live.

In Web Connection 6+ the startup sequence has been minimized with a shortened OnInit() cycle, and a delayed OnLoad handler call that fires only on the first hit to your server. This reduces the potential failure scenarios that can occur if your server fails before it is fully instantiated. Errors can still occur but they are now a little bit easier to debug because the server will at least instantiate and report the error. Previously init errors provided no recourse except a log message in the module log that the server could not be instantiated.

Startup Failures: Module Logging in wcErrors.txt

If the server fails to initialize at the system level (ie. Init() fails and the server never materializes), any errors are logged by the Web Connection Handler (.NET or ISAPI) in wcErrors.txt in the temp folder for the application. Startup errors logged there will include DCOM permissions errors, invalid Class IDs for your COM server, missing files or runtimes or any failure that causes the server to crash during OnInit().

These system level errors can also be triggered if your server's OnInit() code fails. OnInit() fires as part of the FoxPro server's Init() method which is the object constructor and if that fails the server instance is never passed back to the host. There's nothing that can be done to recover from an error like that except log it in``wcErrors.txtandwcTracelog.txt`.

Avoid putting code into OnInit()

To keep startup code to an absolute minimum, avoid writing code in your server's OnInit() method. OnInit() is meant to only set essential server operation settings that are needed for Web Connection servers to start. For everything else that needs to initialize use OnLoad(). In typical scenarios you shouldn't have any code in OnInit() beyond the generated default. This alone should avoid server startup crashes due to FoxPro code errors.

Startup Errors are logged to wcTraceLog.txt

Any code based errors during startup are logged to wcTracelog.txt file which is hooked into the OnInit() and OnLoad() processing of your server. Both methods are wrapped into exception handlers and if they are triggered by errors wcTraceLog.txt receives the error information. You can also implement OnError() to receive the captured exception and log or otherwise take action.

@info-icon-circle Folder Permissions for Logging

Make sure that the folder your application's EXE is running out of has read/write access rights for the IIS Server account that is running FoxPro application as it needs to be able to create and write the wcTracelog.txt file.

Any failures in OnInit() cause the server to not start so wcTracelog.txt and wcErrors.txt will be your only error source.

Errors in OnLoad() log to wcTracelog.txt but also display an error page in the browser with the error information (WC 6.15+). If OnLoad() errors occur the server will run not any further and only display the error message - requests are aborted until the problem is fixed.

Capturing Startup Errors

Beyond looking in wcTraceLog.txt you can also override the wwServer::OnError() method which receives the exception of the failure. In that message you can add custom logging and write out additional environment info into the log file.

You can also use the wwServer::Trace() method to write out information into the wcTraceLog.txt log. For thorny problems this allows to put messages into your code to see how far it gets and echo state that might help you debug the application. It's also useful in requests, but it's especially valuable for debugging startup errors.

The OnError method only serves as an additional error logging mechanism that allows you to capture the error and possibly take action on the error with custom code.

To implement:

FUNCTION OnError(loException)

*** default logging and some cleanup
DoDefault(loException)

*** Do something with the error

'*** Also write out to the local trace text log
THIS.Trace(loException.Message)

ENDFUNC

Add Tracing and Logging Into your Code

Finally if all of this still hasn't fixed your server to start up, you'll have to do some detective work. Your first line of defensive is always debug locally first in a similar environment: Make sure you debug in COM mode locally so you get as close as possible to the live environment.

If you really have to debug the live server you can use the wwServer::Trace() method to quickly write out trace messages to the wcTraceLog.txt file.

PROTECTED FUNCTION OnLoad

THIS.Trace("OnLoad Started")

THIS.InitializeDataBase()
THIS.Trace("DataBase Initialized")

THIS.SetLibraries()
THIS.Trace("Libiraries loaded")

...

THIS.Trace("OnLoad Completed")
ENDFUNC

By default the wwServer::Trace() method stores simple string output with a date stamp in wcTraceLog.txt in the application's startup folder.

Using this type of Print-Line style output you can put trace points in key parts of your startup sequence to see whether code is reached and what values are set.

Common Startup Errors

Common startup errors include:

Invalid COM Object Configuration

Make sure your servers are listed properly in web.config (.NET ) or wc.ini (ISAPI) and point at the right ProgIds for your COM servers. Also make sure the COM Servers are registered.

Folder Locations

Make sure that your application can run out of the deployed folder and has access to all the locations that it needs to read local data from. Make sure that paths are set in the environment and network drives are connected and so forth. Servers don't run under the interactive account so don't expect the same permissions and environment as your loggd in account especially if you depend on mapped drives - you probably have to map drives as part of your startup routine by checking if a drive is mapped and if not mapping it. Use SET PATH TO <path> ADDITIVE or set the system path to include needed folders.

Folder Permissions

Make sure that any files including data files you access on the local file system have the right permissions so they can be read and written to. Remember the IIS or DCOM permissions determine what account your application is running under.

Summary

Startup debugging of Web Connection is always tricky but Web Connection 6's new features make the process a lot easier by providing much better server configuration support to get your apps running correctly, and if things shouldn't go well on the first try provide you more error information so you can debug the failure more easily.

In addition to the better error trapping and error reporting you can also take pro-active steps to capture errors and log them out into the trace log for further investigation. Nobody wants to see their applications fail especially immediately after installation, but now you should be ready to deal with any issues that might crop. Now - go write some code!

IIS Server Authentication and Loopback Restrictions

$
0
0

Here's a common problem I hear from user installing Web Connection and trying to test their servers from the same live server machine:

When logged into your Windows server, IIS Windows authentication through a browser does not work for either Windows Auth or Basic Auth using Windows user accounts. Login attempts just fail with a 401 error.

However, accessing the same site externally and logging in works just fine, using Windows log on credentials. It only fails when on the local machine.

Loopback Protection on Windows Server

In the past these issues only affected servers, but today I just noticed that on my local Windows install with Windows 10 1803 I also wasn't able to log in with Windows Authentication locally. As if it isn't hard enough to figure out which user id you need on Windows between live account and local account, I simply was unable to log in with any bloody credentials.

Servers have always had this 'feature' enabled by default to prevent local access attacks on the server (not quite sure what this prevents since you have to log in anyway, but whatever).

When attempting to authenticate on a local Web site using a Windows account using username and password always fails when this policy is enabled. For Web Connection this specifically affects the admin pages that rely on Windows authentication for access.

This problem is caused by a policy called Loopback Protection that is enabled on server OSs by default. Loopback Protection disables authenticating against local Windows accounts through HTTP and a Web browser.

For more info please see this Microsoft KB entry:
https://support.microsoft.com/en-us/kb/896861

Quick Fix: Disable Loopback Check

The work around is a registry hack that disables this policy explicitly.

Starting with Web Connection 6.21 and later you can run the following using the Console running as an Administrator:

c:\> console.exe disableloopbackcheck

To reverse the setting:

c:\> console.exe disableloopbackcheck off

To perform this configuration manually find this key in the registry on the server:

HKEY_LOCAL_MACHINE\SYSTEM\CurrentControlSet\Control\Lsa

and edit or add a new key:

DisableLoopbackCheck (DWORD)

then sent the value to 1 to disable the loopback check (local authentication works), or to 0 (local authentication is not allowed).

Summary

Web Connection 6.21 isn't here yet as of the time of writing of this post, but in the meantime you can just use the registry hack to work around the issue.

Viewing all 134 articles
Browse latest View live